How to Activate TiviMate With M3U and Xtream Codes (Step by Step)
Activate TiviMate step by step: add an M3U URL or Xtream Codes on Firestick, Android TV and Google TV, then watch Live TV, movies and series.
By IPTV Guide
8 min read
1 Comment
Quick Summary
To activate TiviMate, open the app and select Add playlist. For an M3U URL, choose M3U playlist > Enter URL, type your link and select Next. For Xtream Codes, choose Xtream Codes and enter the server address, username and password. TiviMate processes the playlist, you give it a name and select Done. That’s it: Live TV, movies and series are ready.
Good to Know: TiviMate Has No Channels
TiviMate is only a player. It doesn’t provide any IPTV channels, playlists or subscriptions: you need your own M3U URL or Xtream Codes from your IPTV provider. Adding a playlist is free, but movies, series and the TV guide only work with TiviMate Premium.
TiviMate doesn’t need a website or a Device ID to activate: you add your IPTV playlist directly in the app with your TV remote. This guide shows both ways to activate TiviMate on Firestick, Android TV and Google TV, with an M3U URL and with Xtream Codes, then how to find Live TV, movies and series, and how TiviMate Premium works.
Before You Start: What You Need
TiviMate installed on your Firestick, Android TV or Google TV (see how to install TiviMate).
Your IPTV login from your provider: an M3U URL or Xtream Codes (server address, username and password).
Tip: long links are easier to type with your phone. When the keyboard appears on Firestick, scan the QR code next to it and type the link on your phone.
Method 1: Activate TiviMate With an M3U URL
Use this method if your provider gave you an M3U playlist link.
Step 1: Select Add Playlist
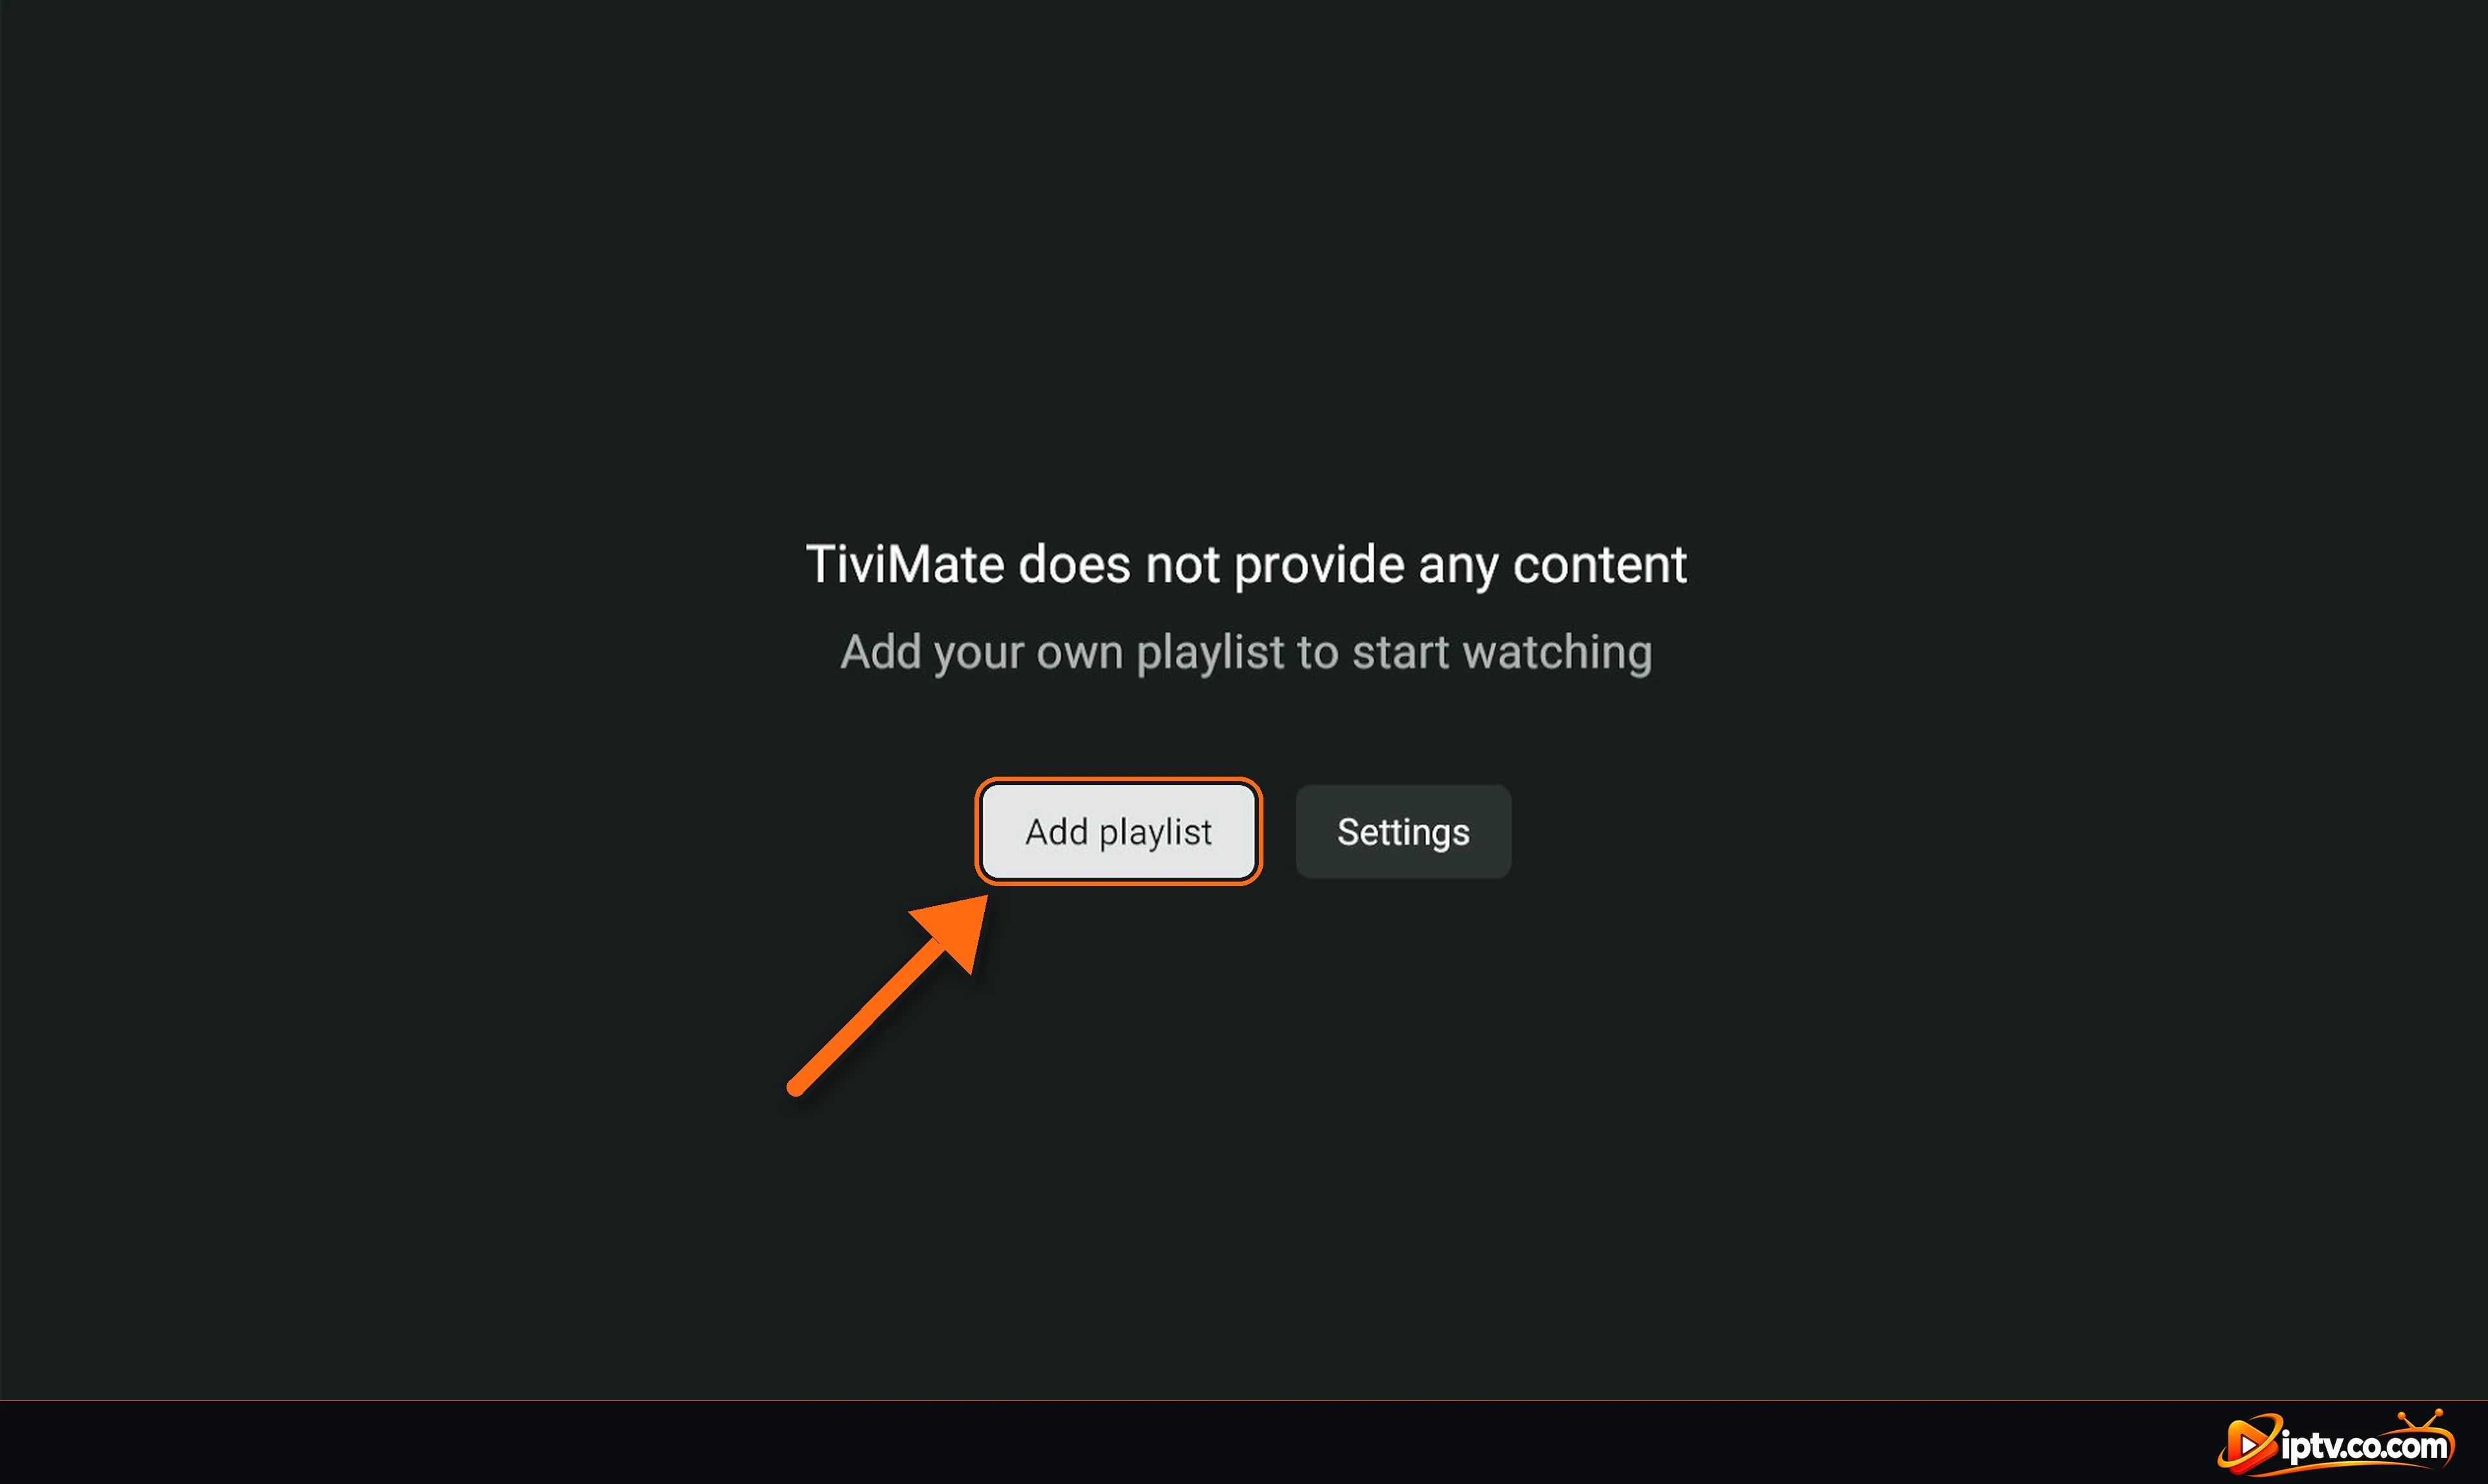
Open TiviMate. On the start screen (TiviMate does not provide any content), select Add playlist. If you already have a playlist, go to Settings > Playlists > Add playlist.
Select Add playlist in TiviMate
Step 2: Select M3U Playlist
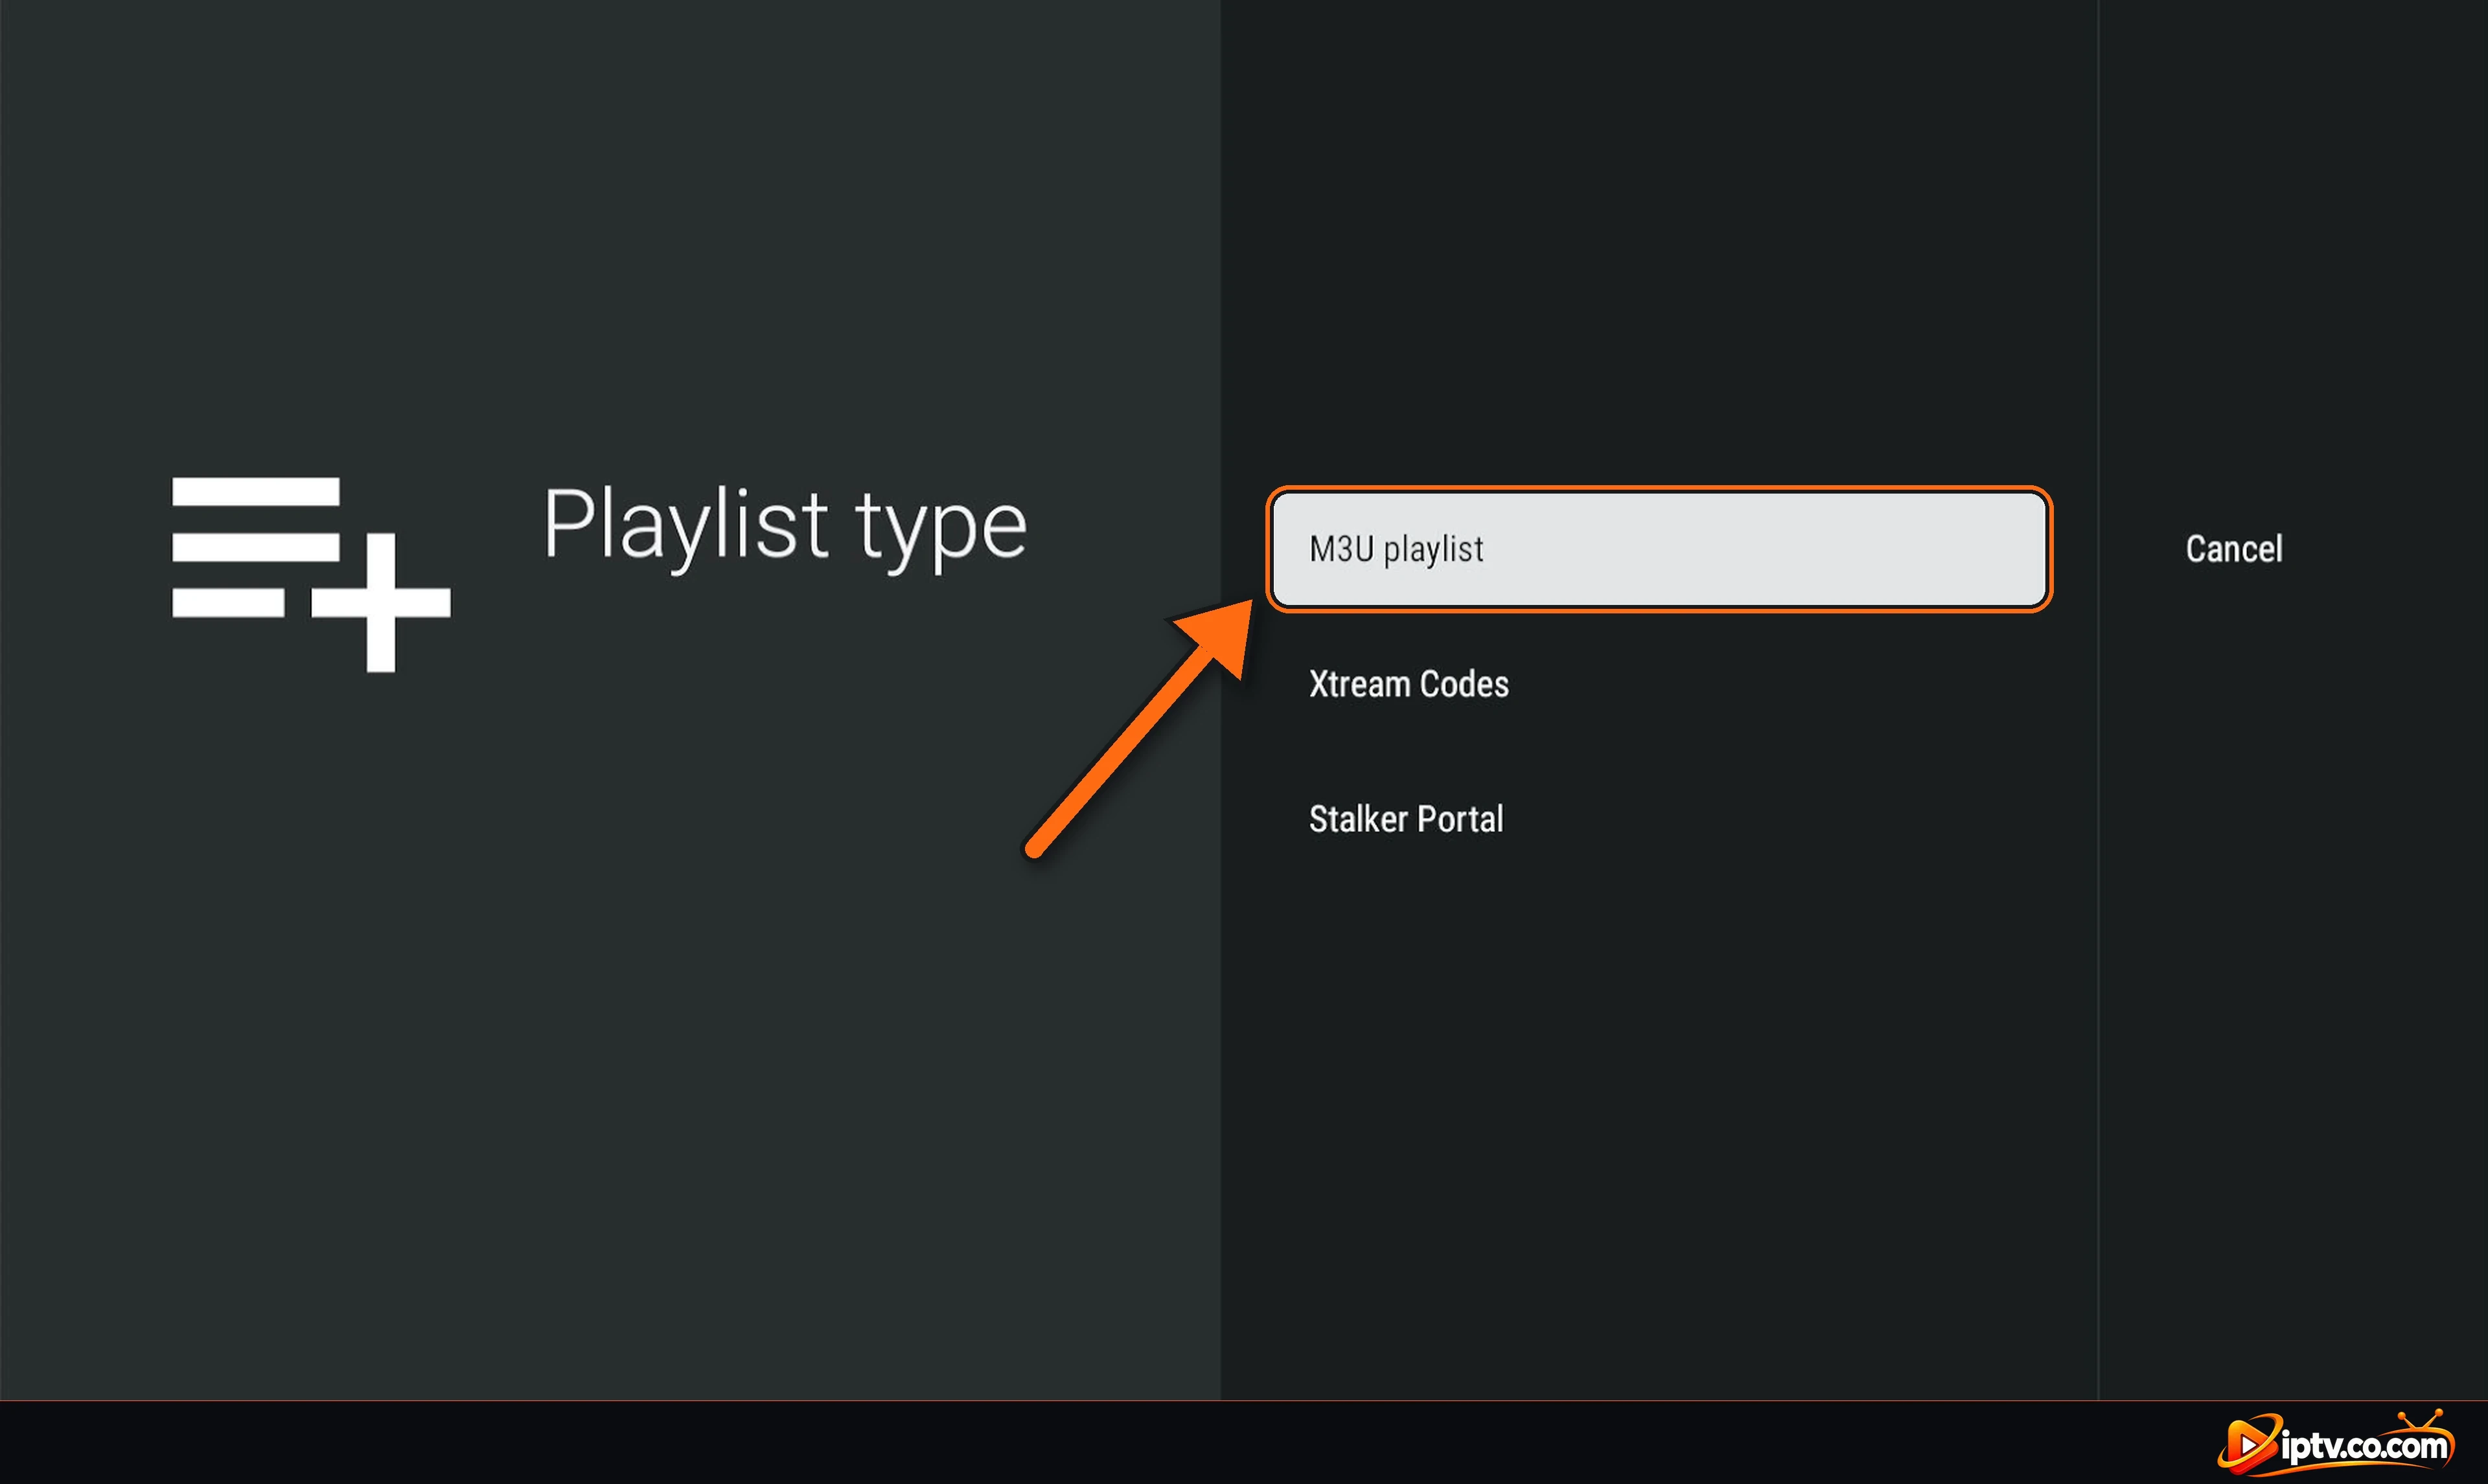
On the Playlist type screen, select M3U playlist.
Select M3U playlist as the playlist type
Step 3: Select Enter URL
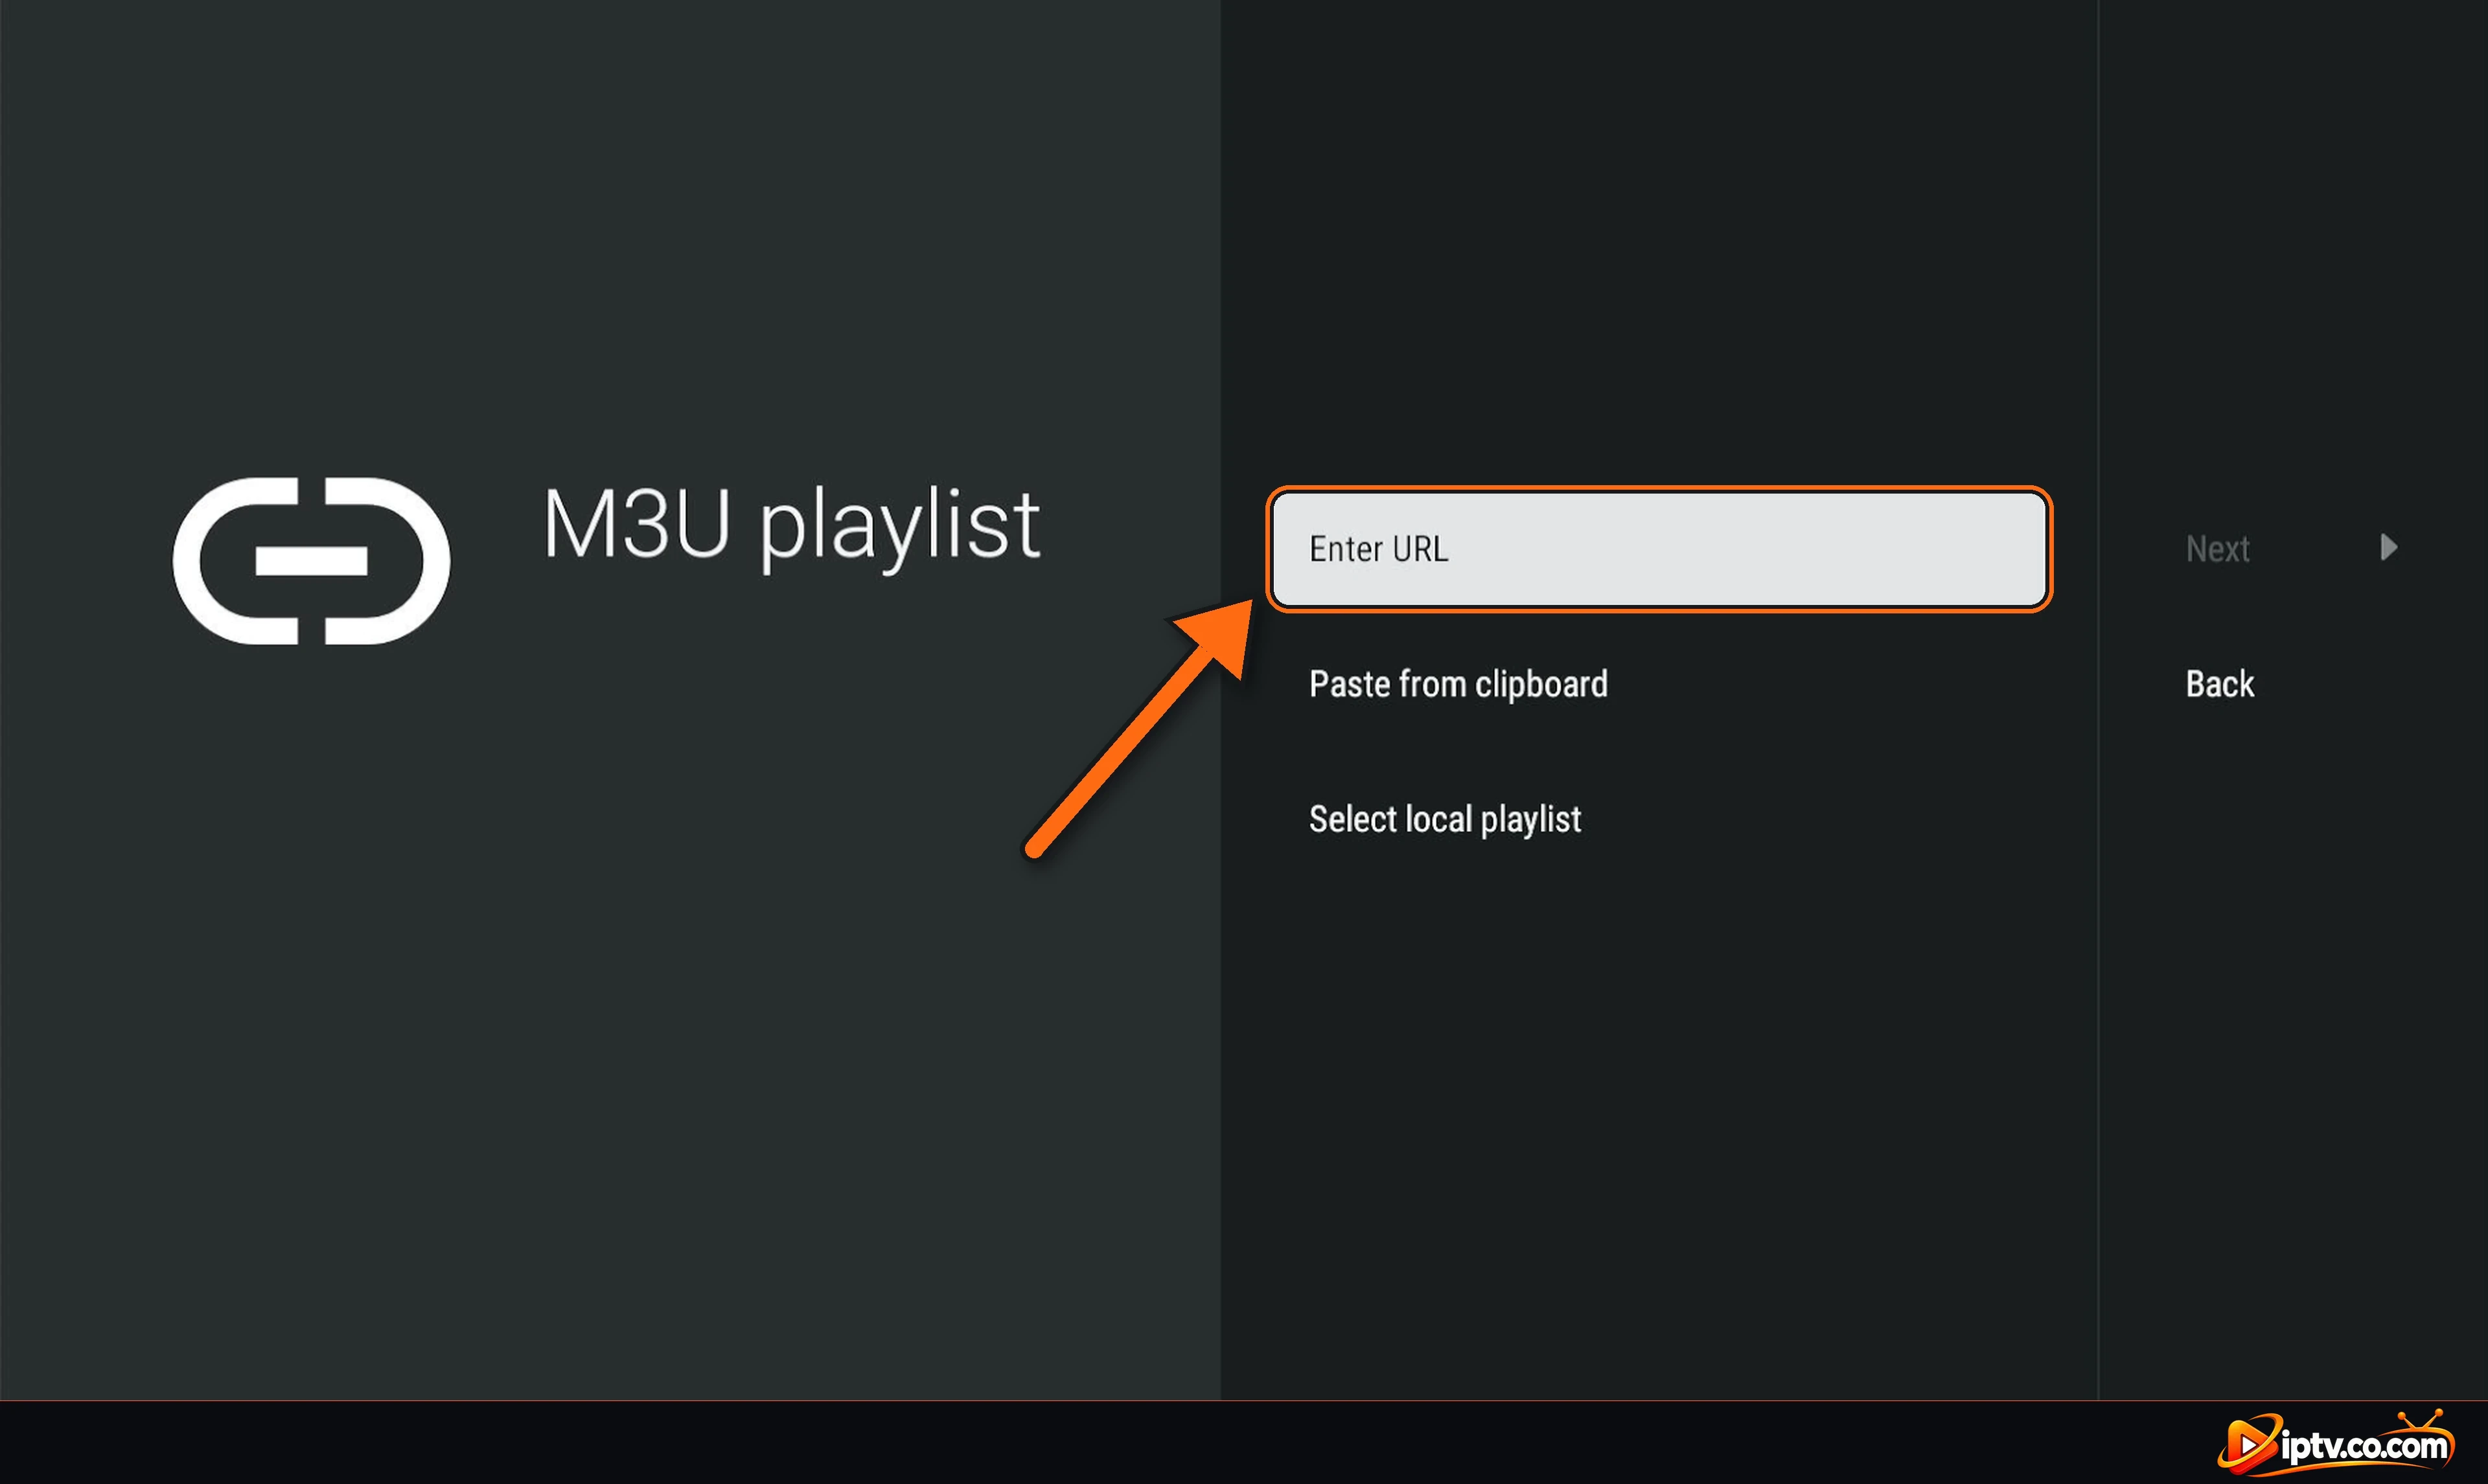
Select Enter URL. You can also use Paste from clipboard if you copied the link on the device.
Select Enter URL on the M3U playlist screen
Step 4: Type Your M3U URL and Select Next
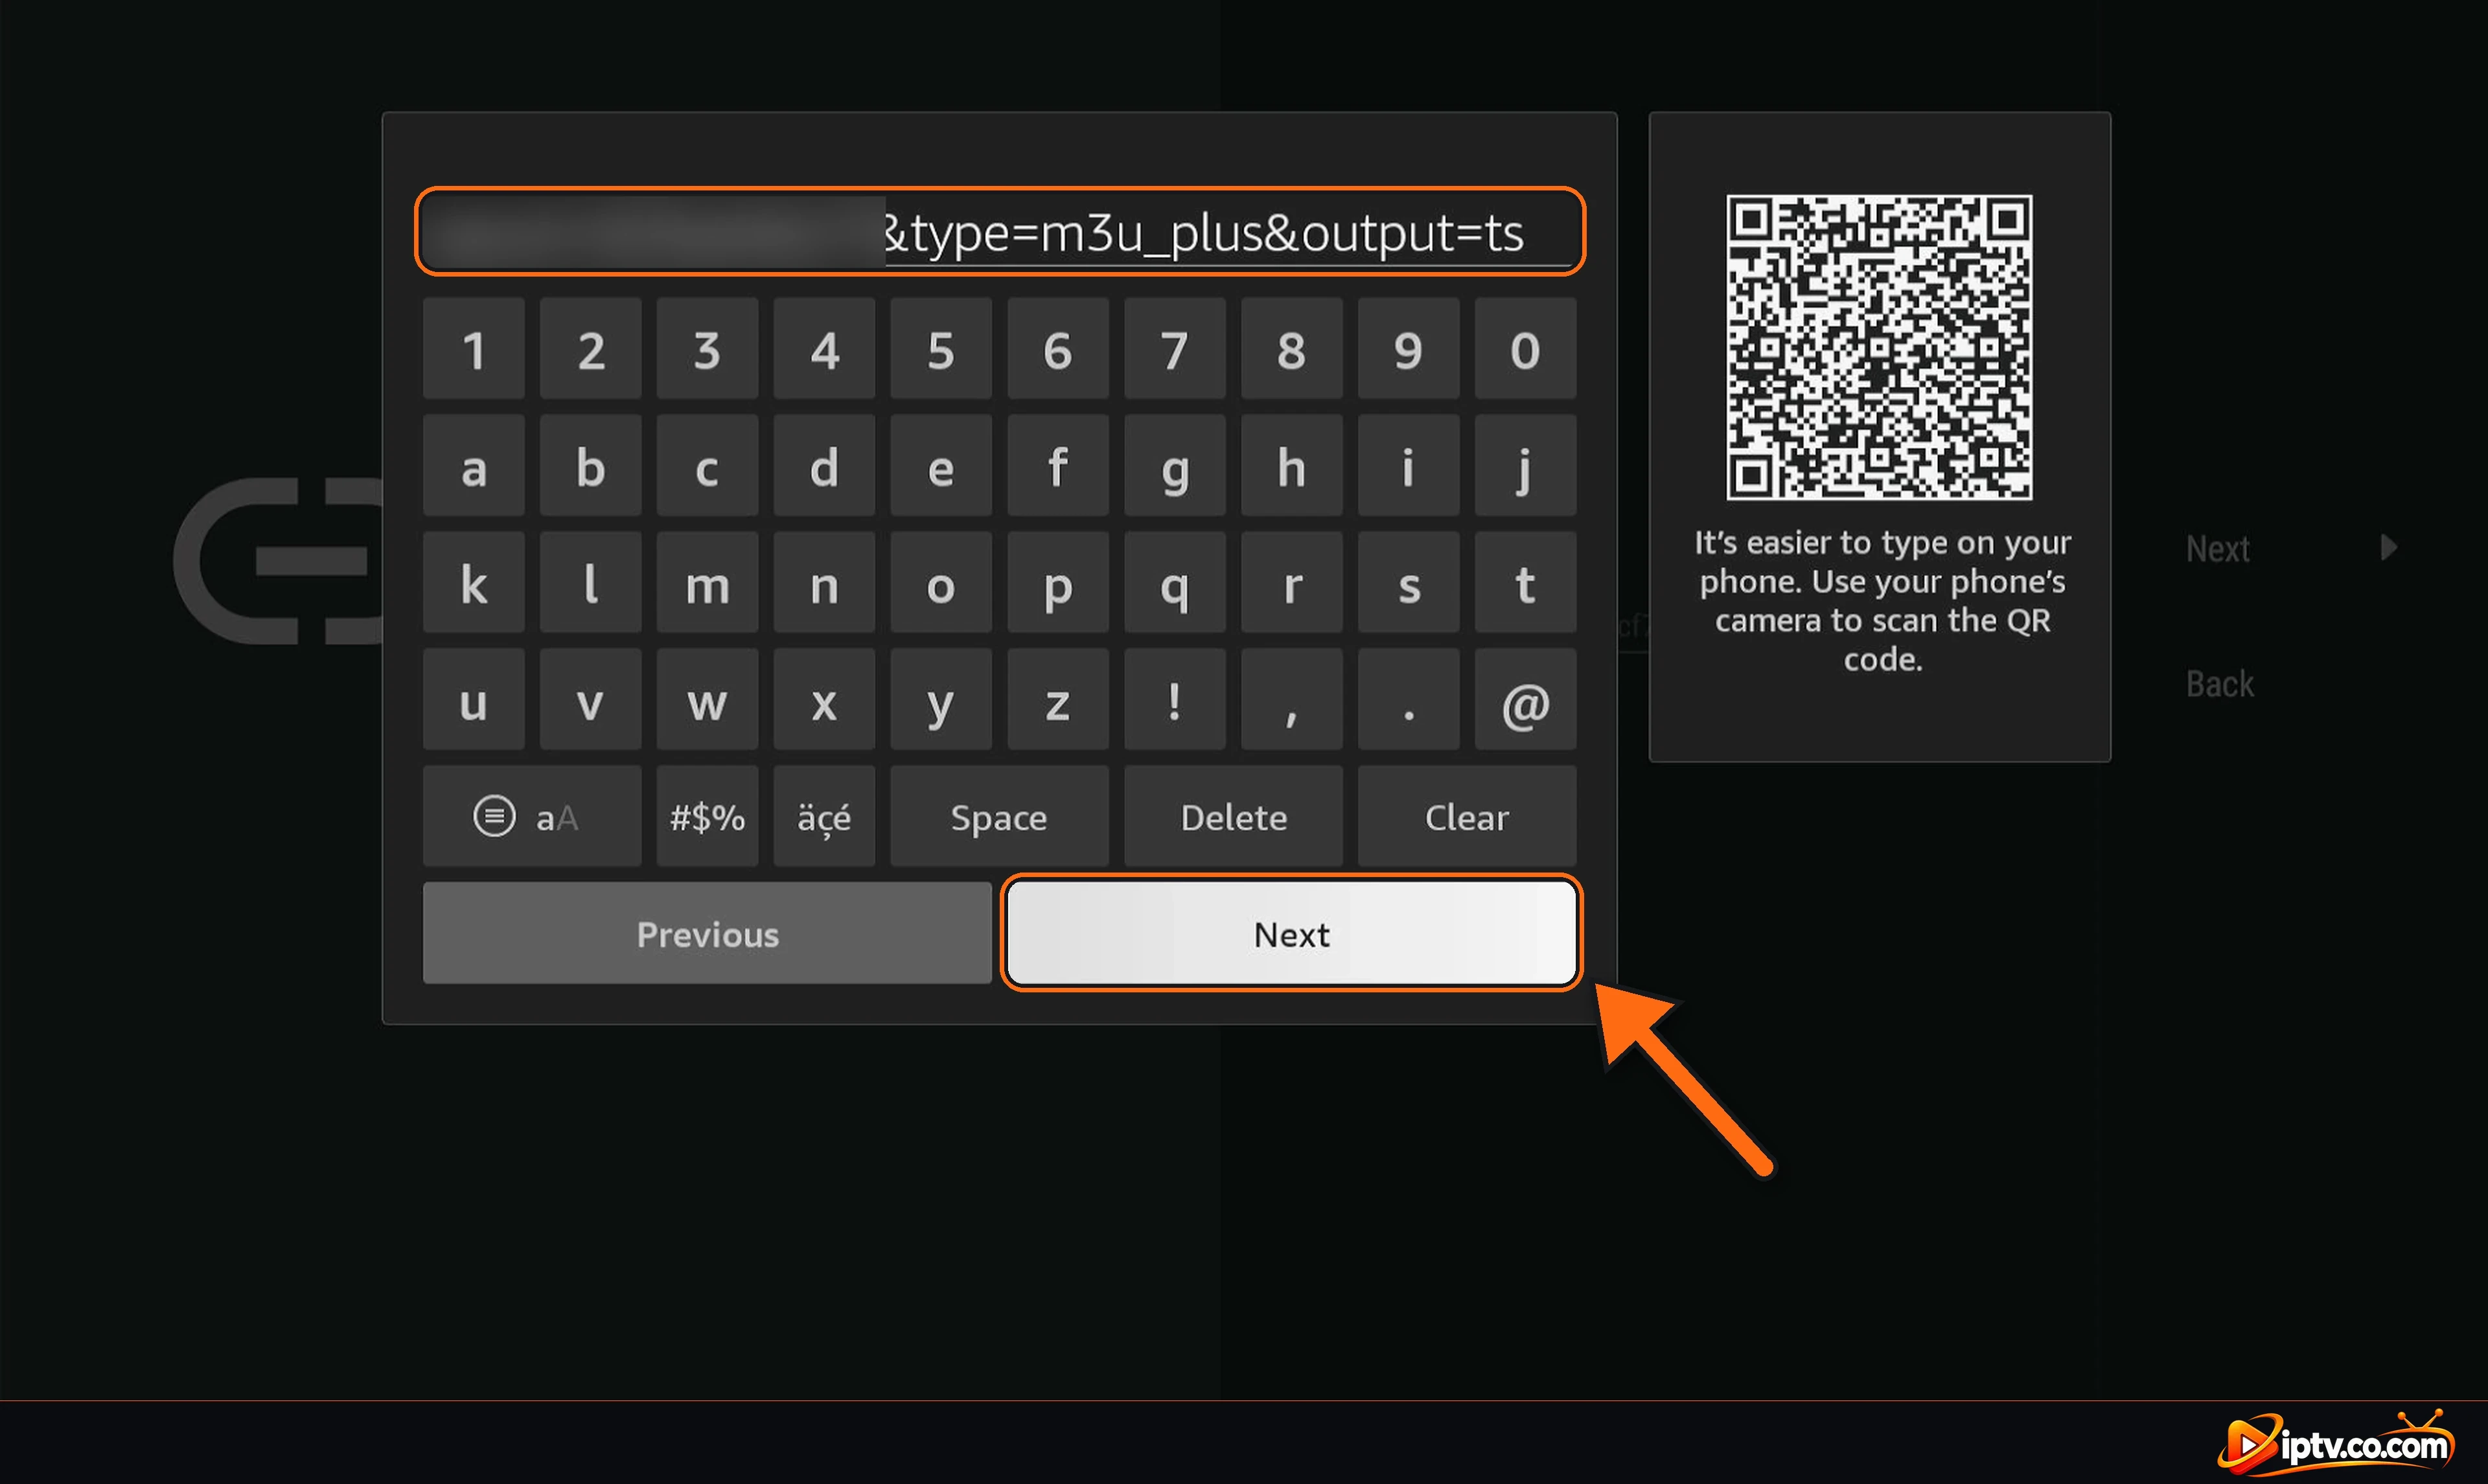
Type your full M3U link exactly as your provider sent it, for example http://your-provider-url/get.php?username=…&password=…&type=m3u_plus&output=ts, then select Next on the keyboard.
Type the M3U URL with the keyboard and select Next
Step 5: Select Next
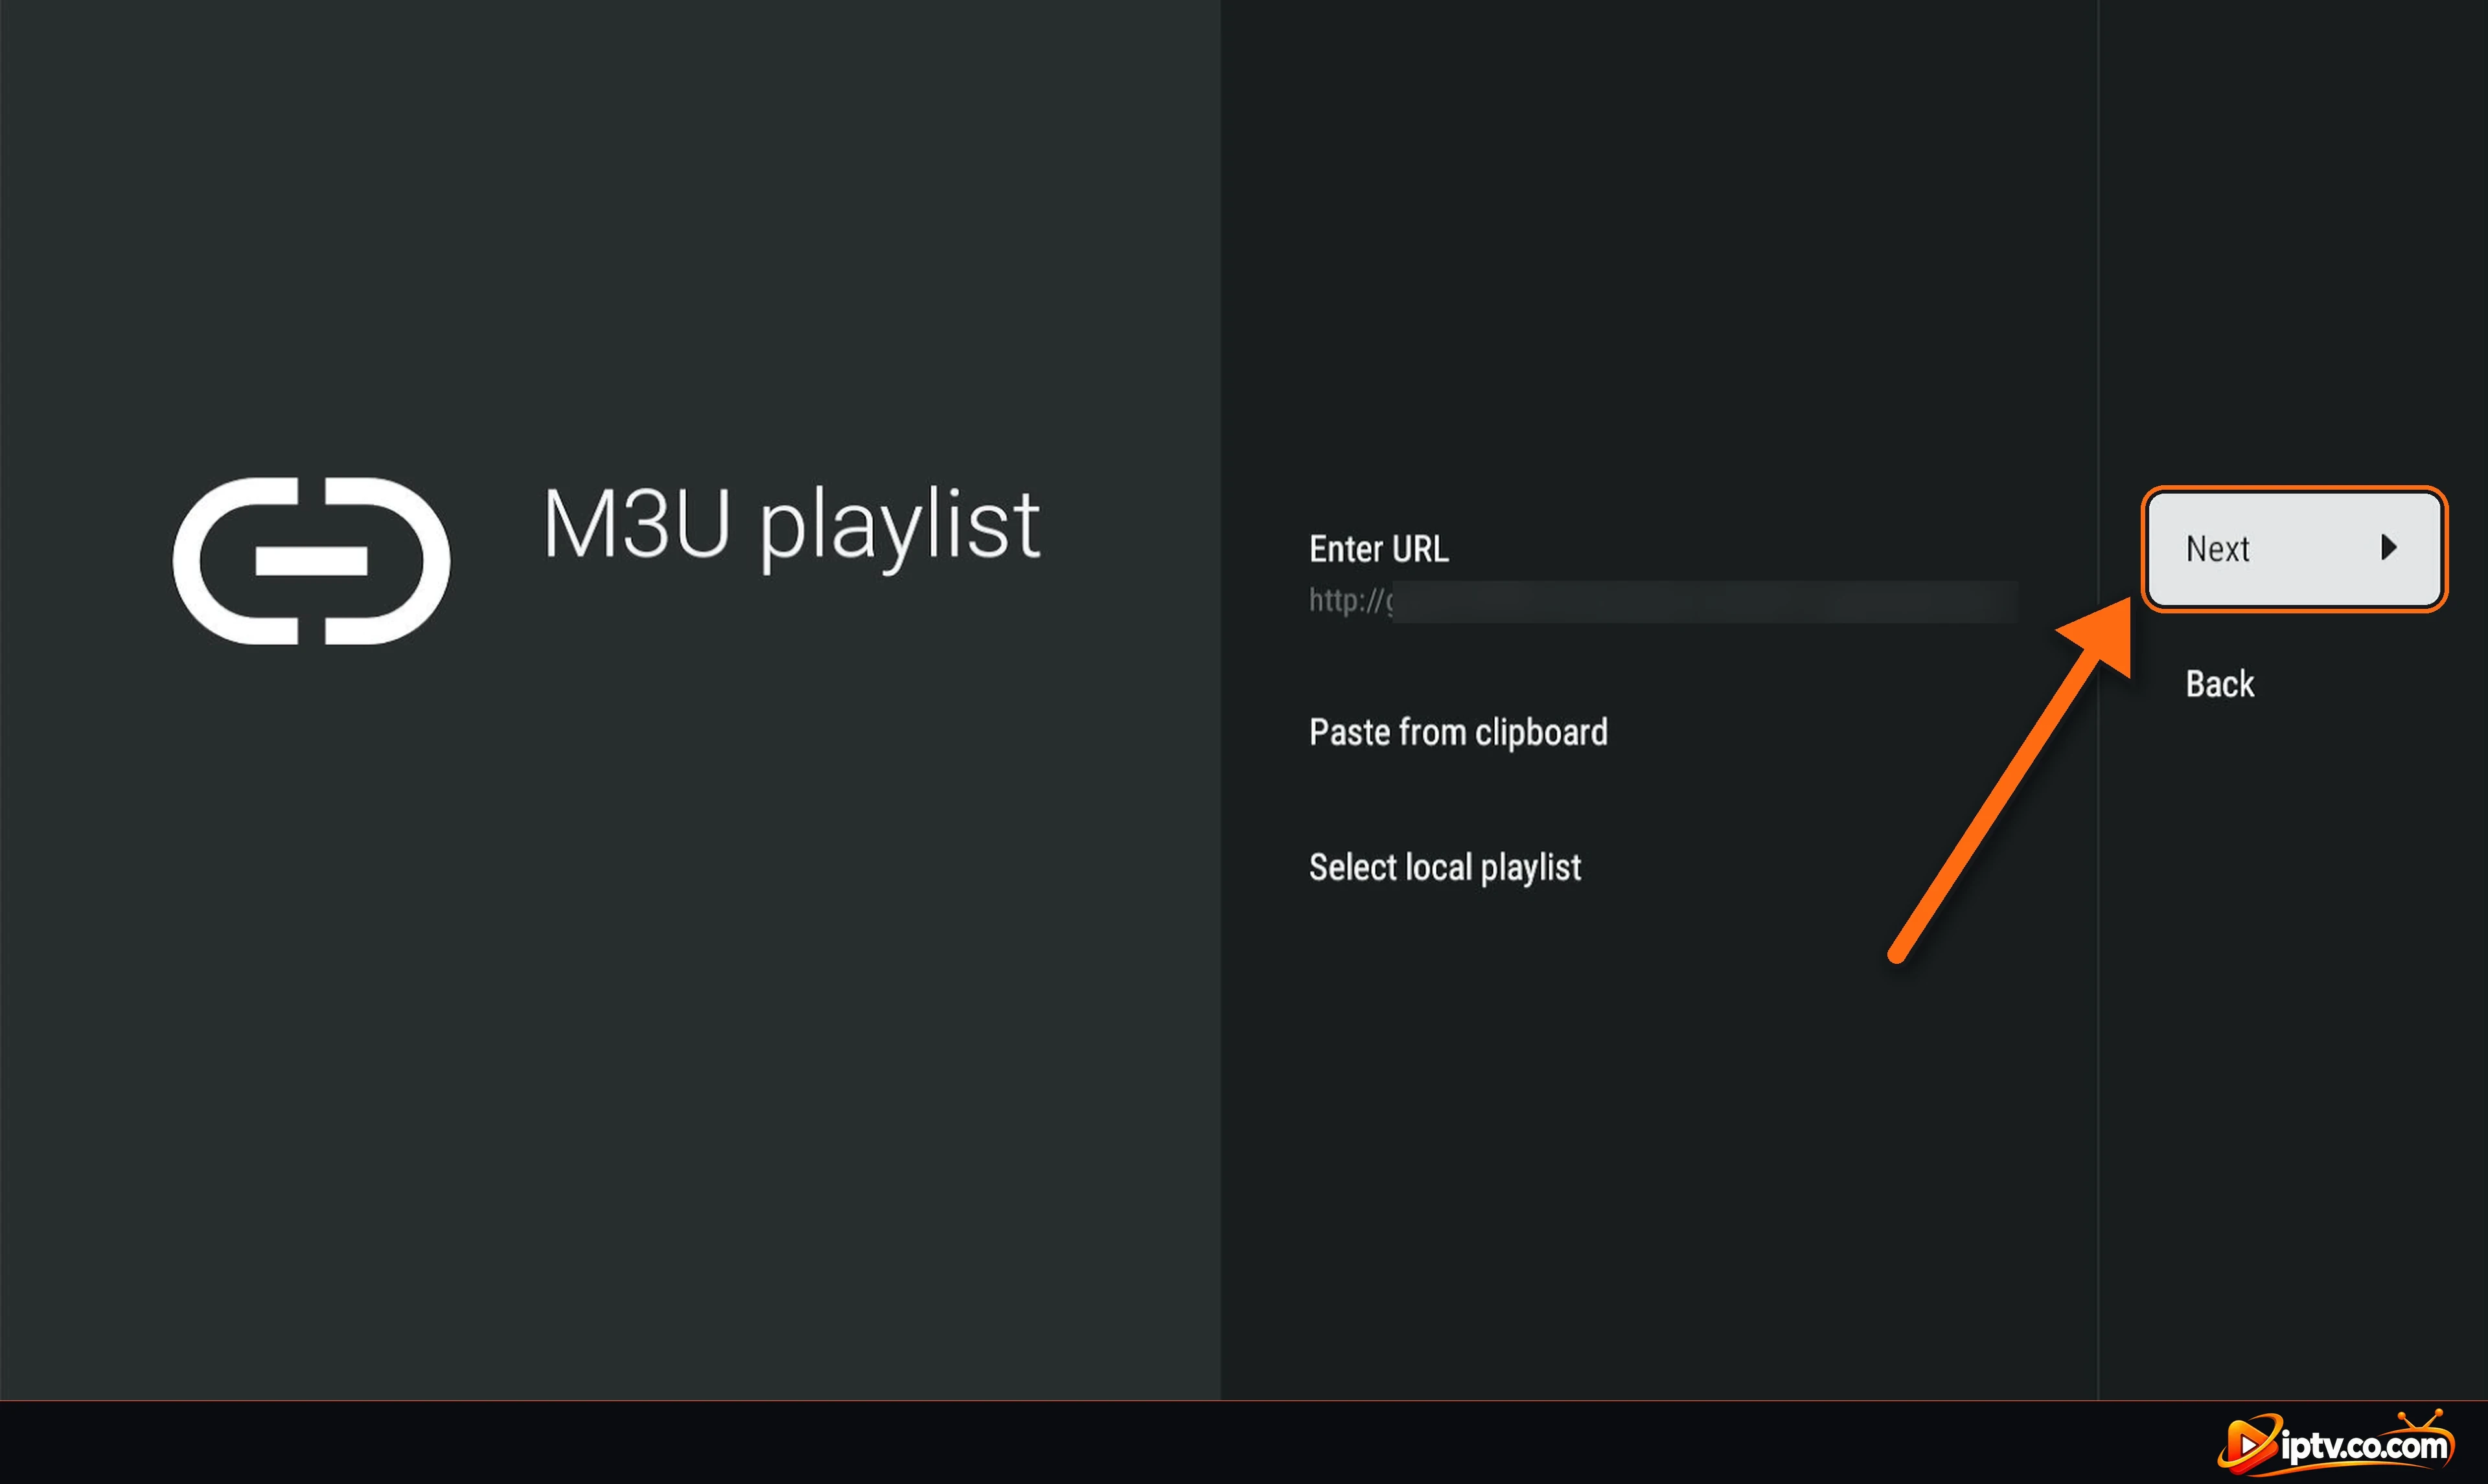
Your link now appears under Enter URL. Select Next on the right.
Select Next after entering the M3U URL
Step 6: Wait While TiviMate Processes the Playlist
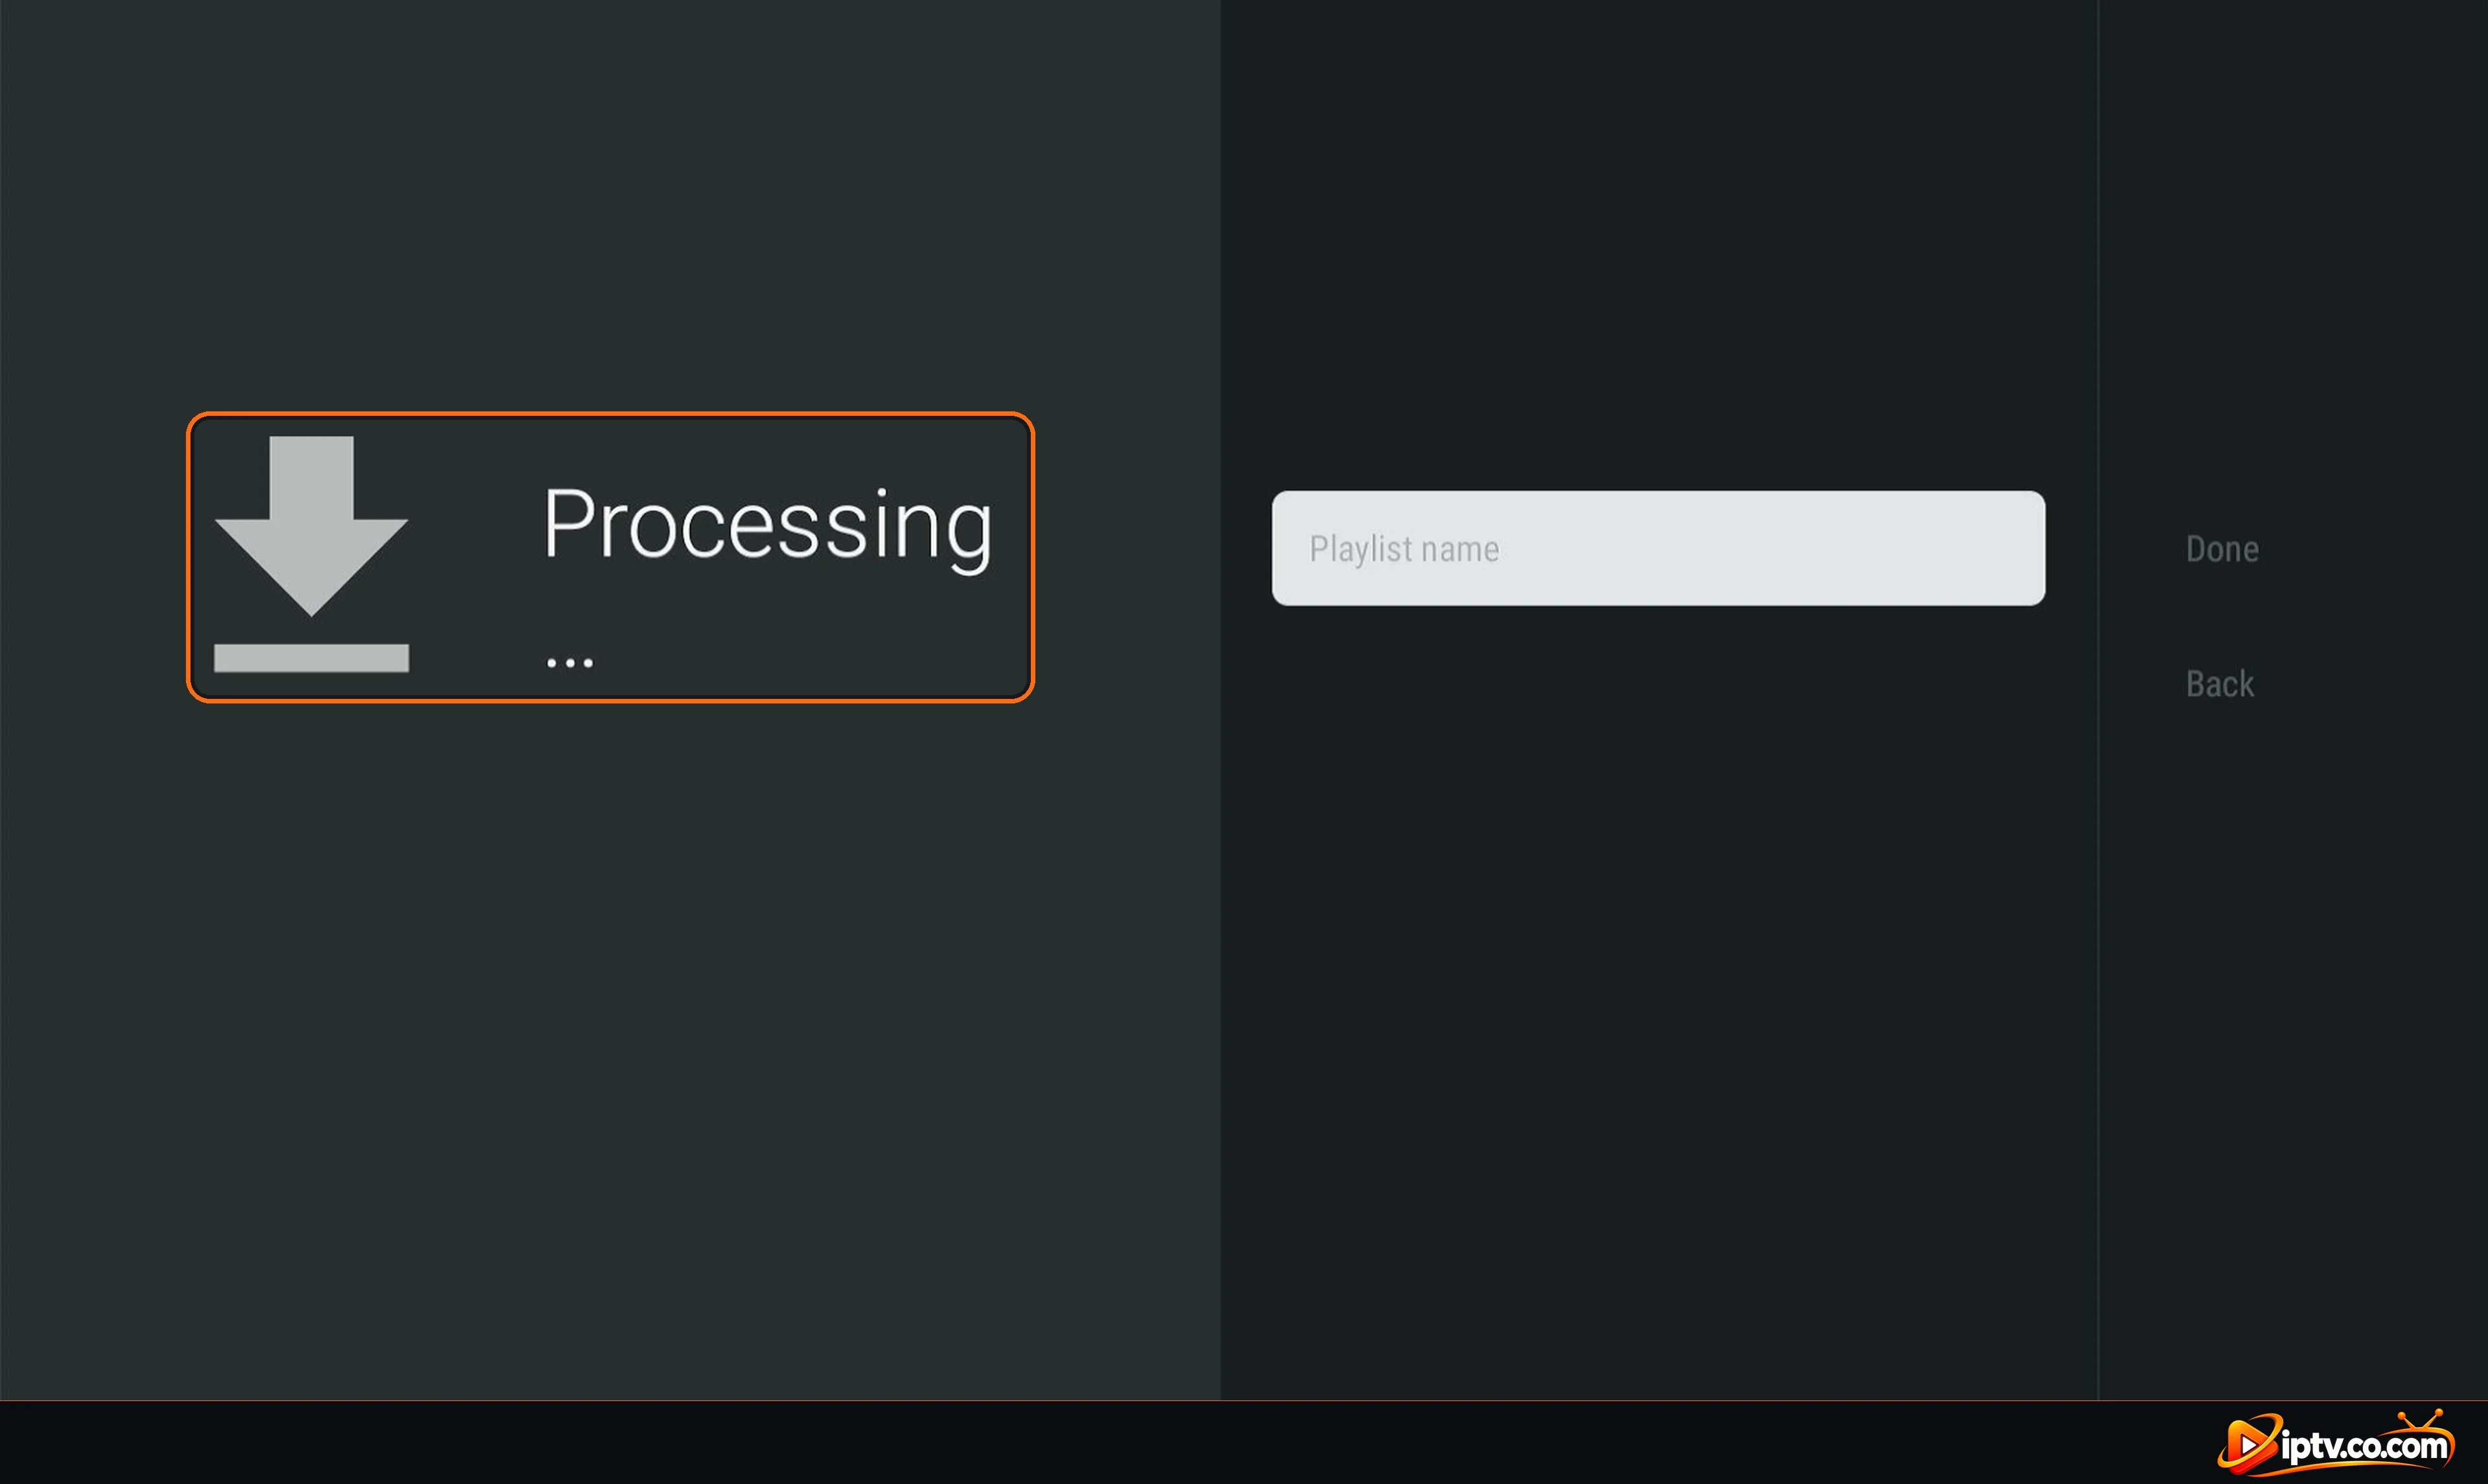
TiviMate shows Processing… while it downloads your channels, movies and series. Large playlists can take a minute.
TiviMate is processing the playlist
Step 7: Give the Playlist a Name
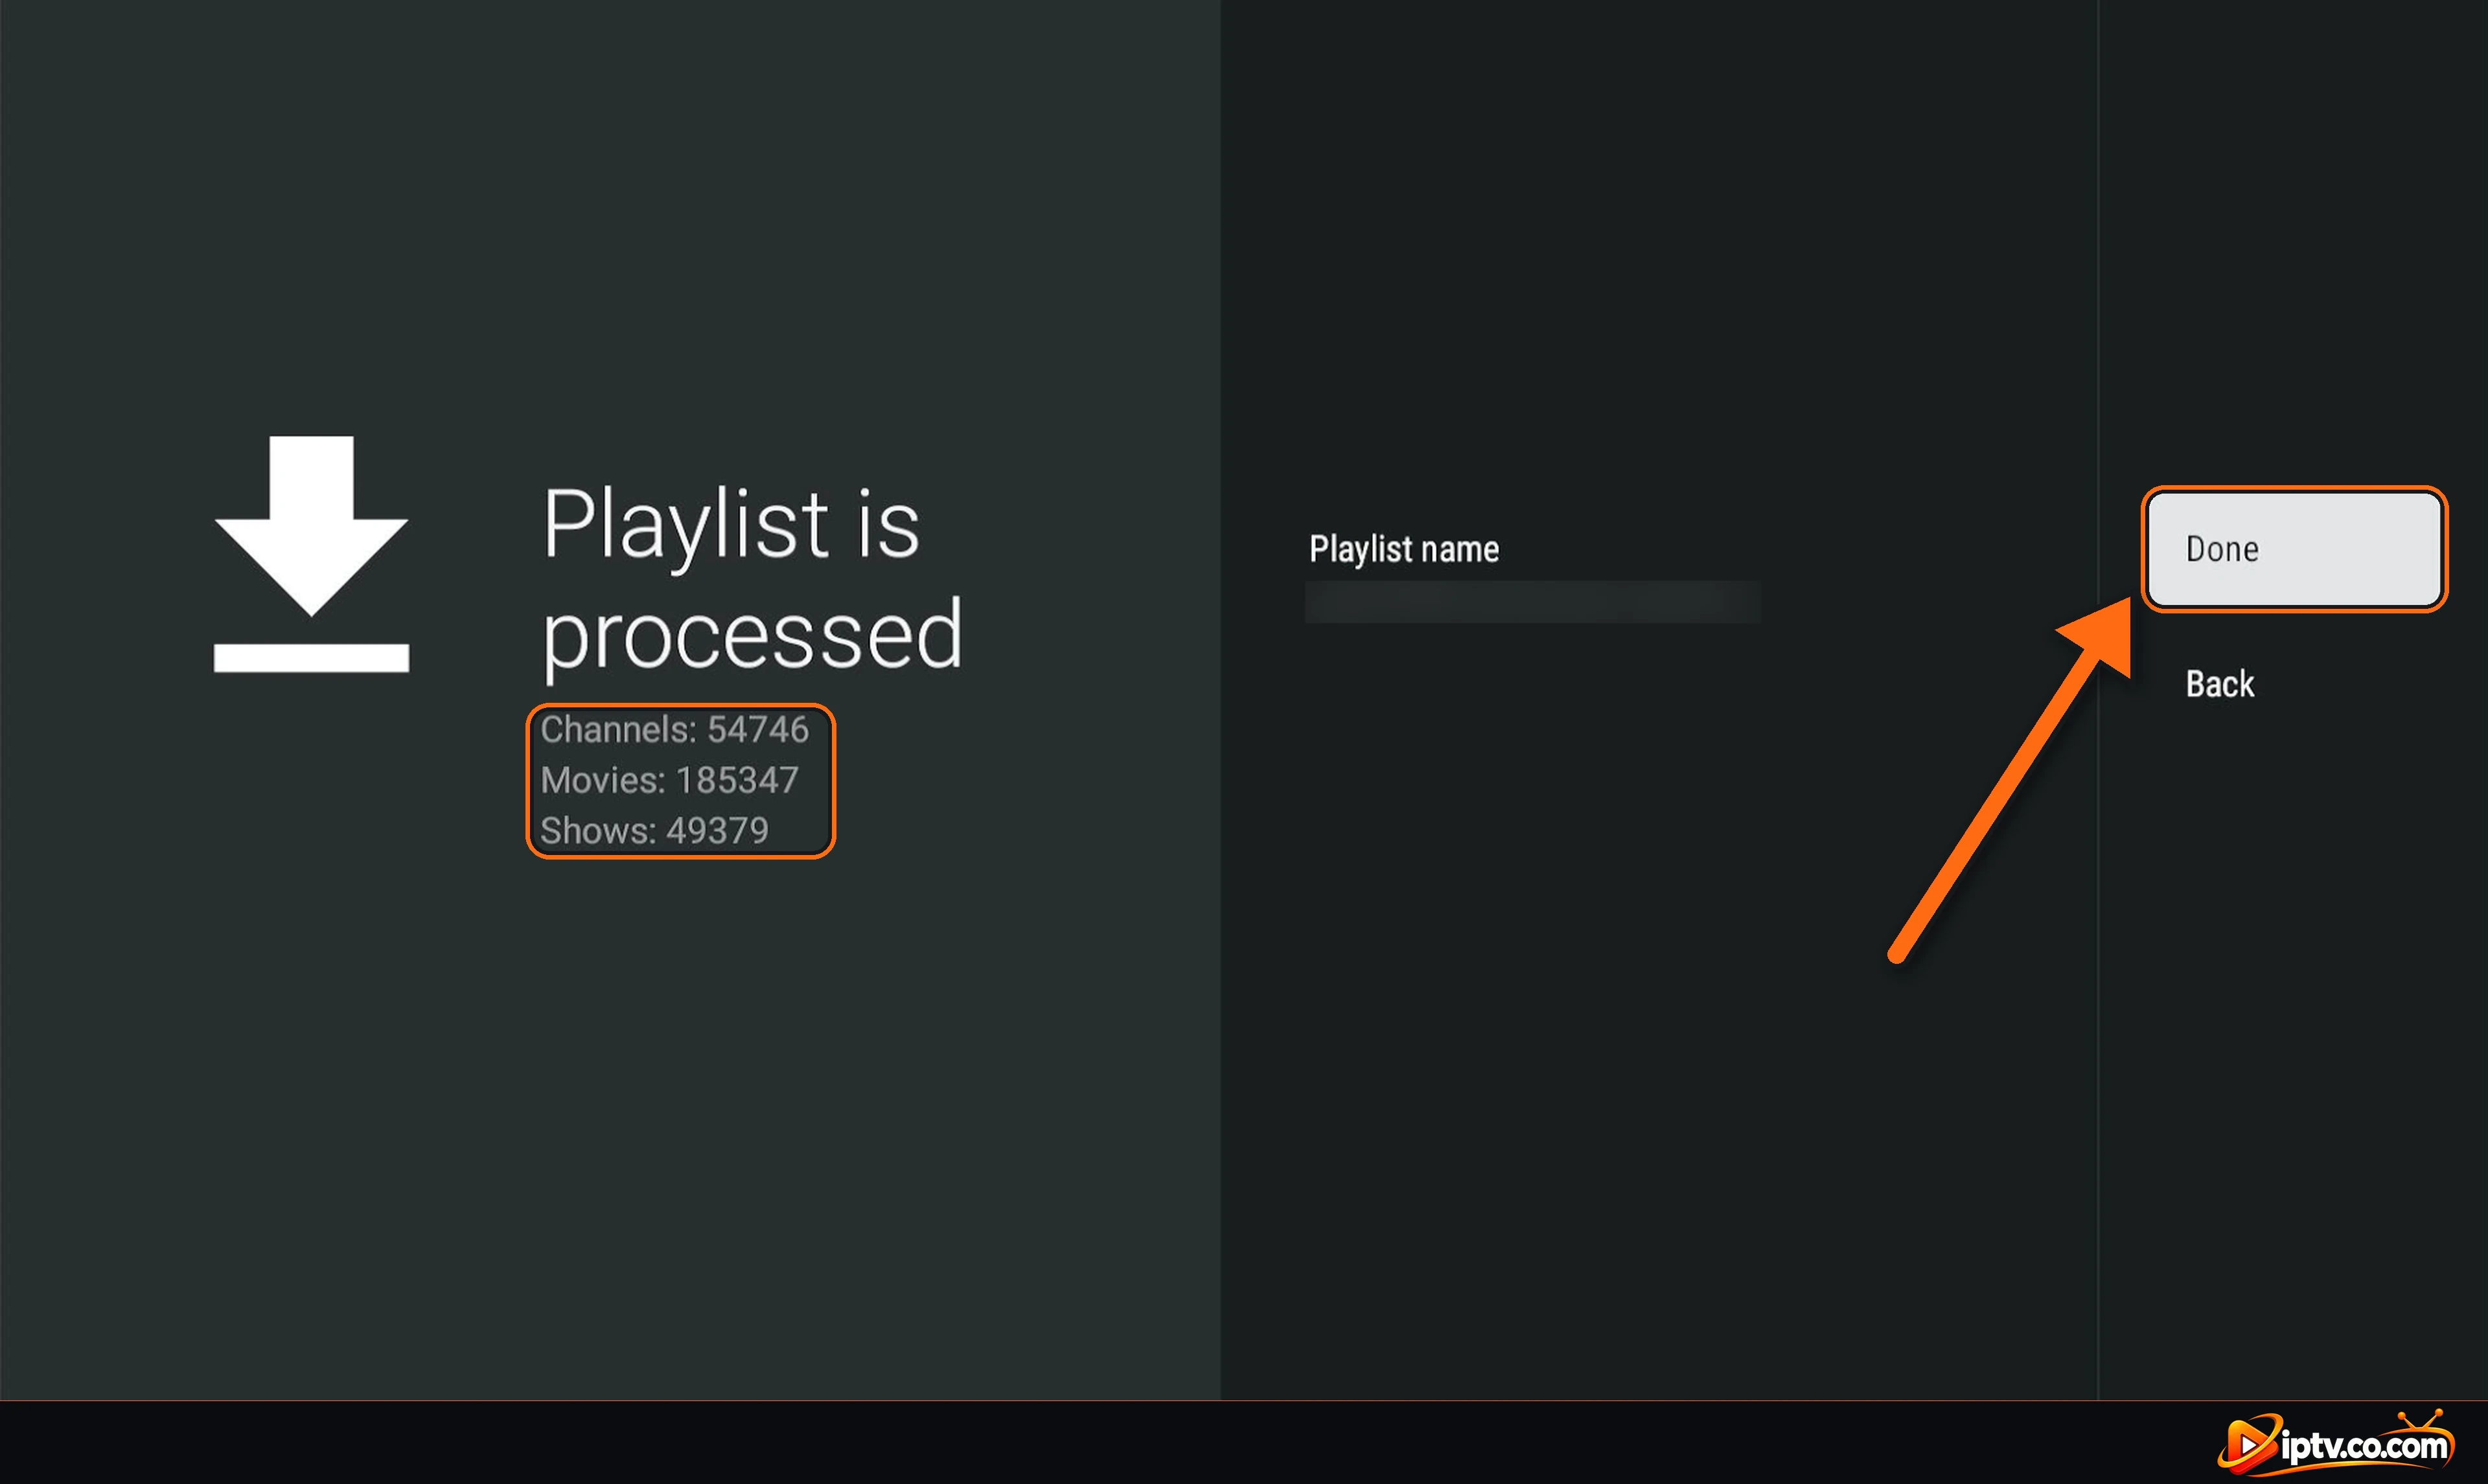
When you see Playlist is processed, TiviMate fills in a playlist name. Select Playlist name if you want to change it: write any playlist name, any name you like, for example iptv.co.com.
Select Playlist name to rename the playlist
Step 8: Check the Numbers and Select Done
TiviMate shows how many Channels, Movies and Shows it found. Select Done and wait a few seconds (Please wait…) while TiviMate opens your playlist. Then go to Live TV, movies and series.
Playlist is processed: check the numbers and select Done
Method 2: Activate TiviMate With Xtream Codes
Use this method if your provider gave you a server address (host), username and password.
Step 1: Select Add Playlist
Open TiviMate and select Add playlist (or Settings > Playlists > Add playlist).
Select Add playlist in TiviMate
Step 2: Select Xtream Codes
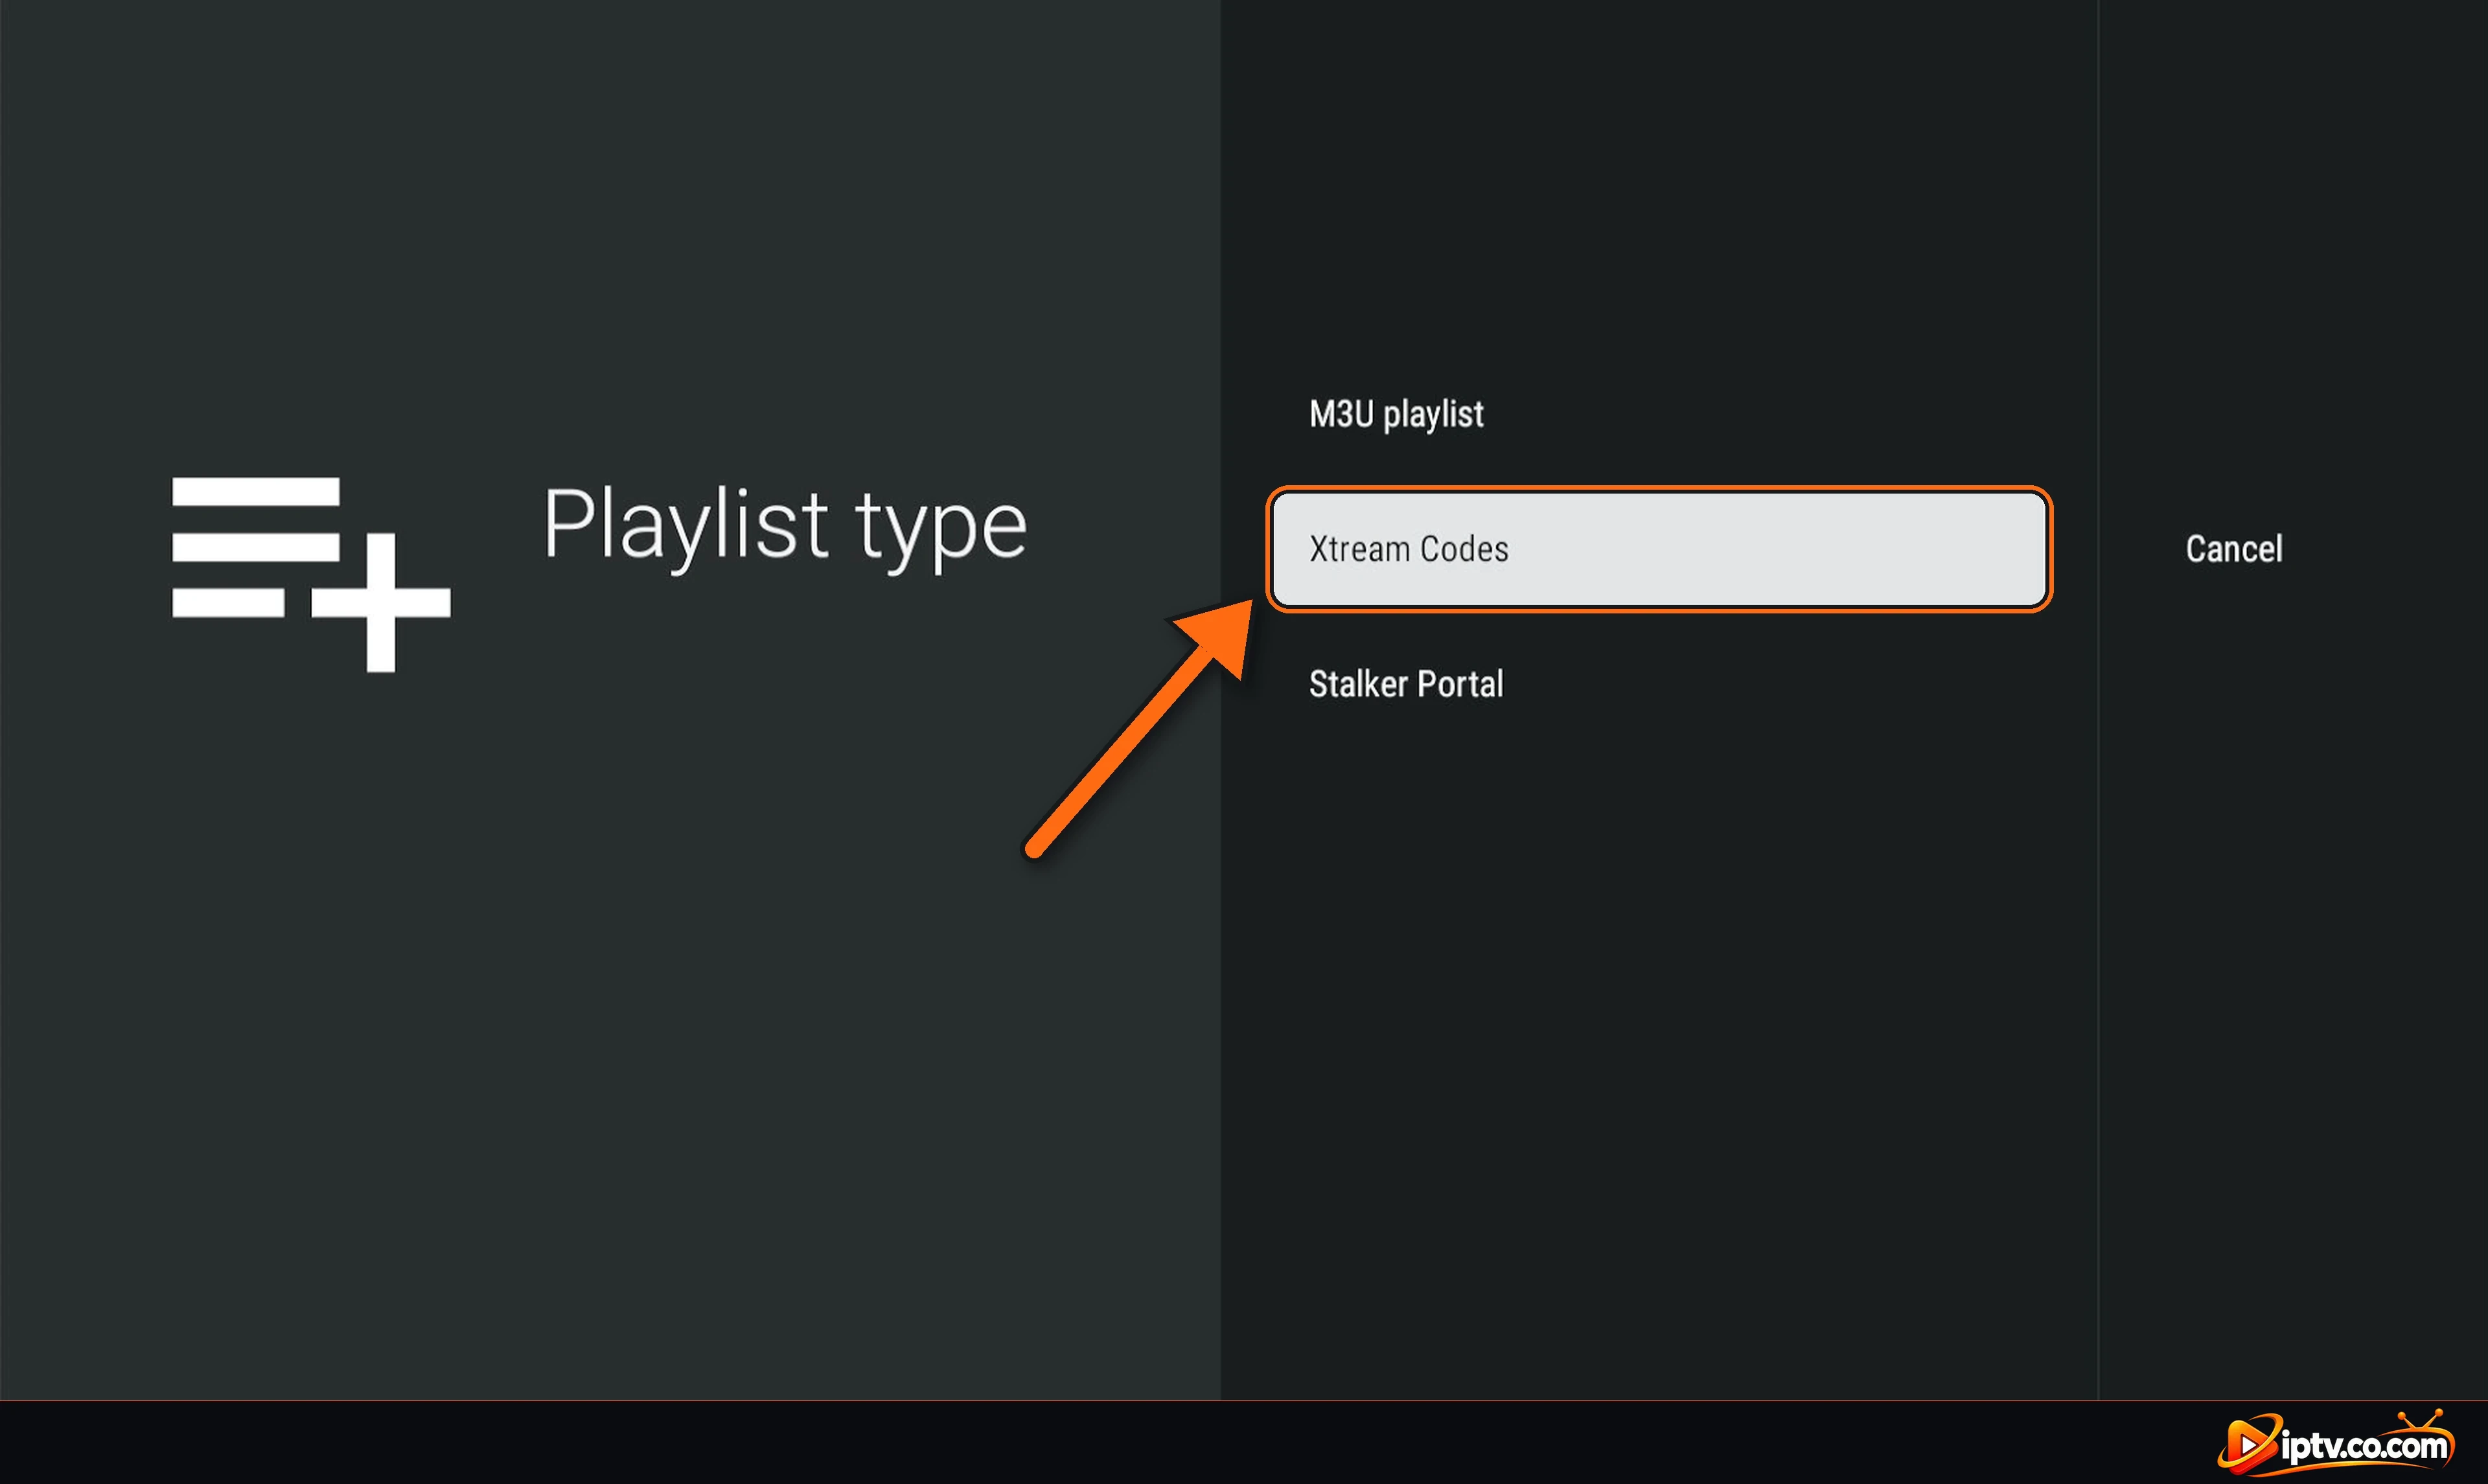
On the Playlist type screen, select Xtream Codes.
Select Xtream Codes as the playlist type
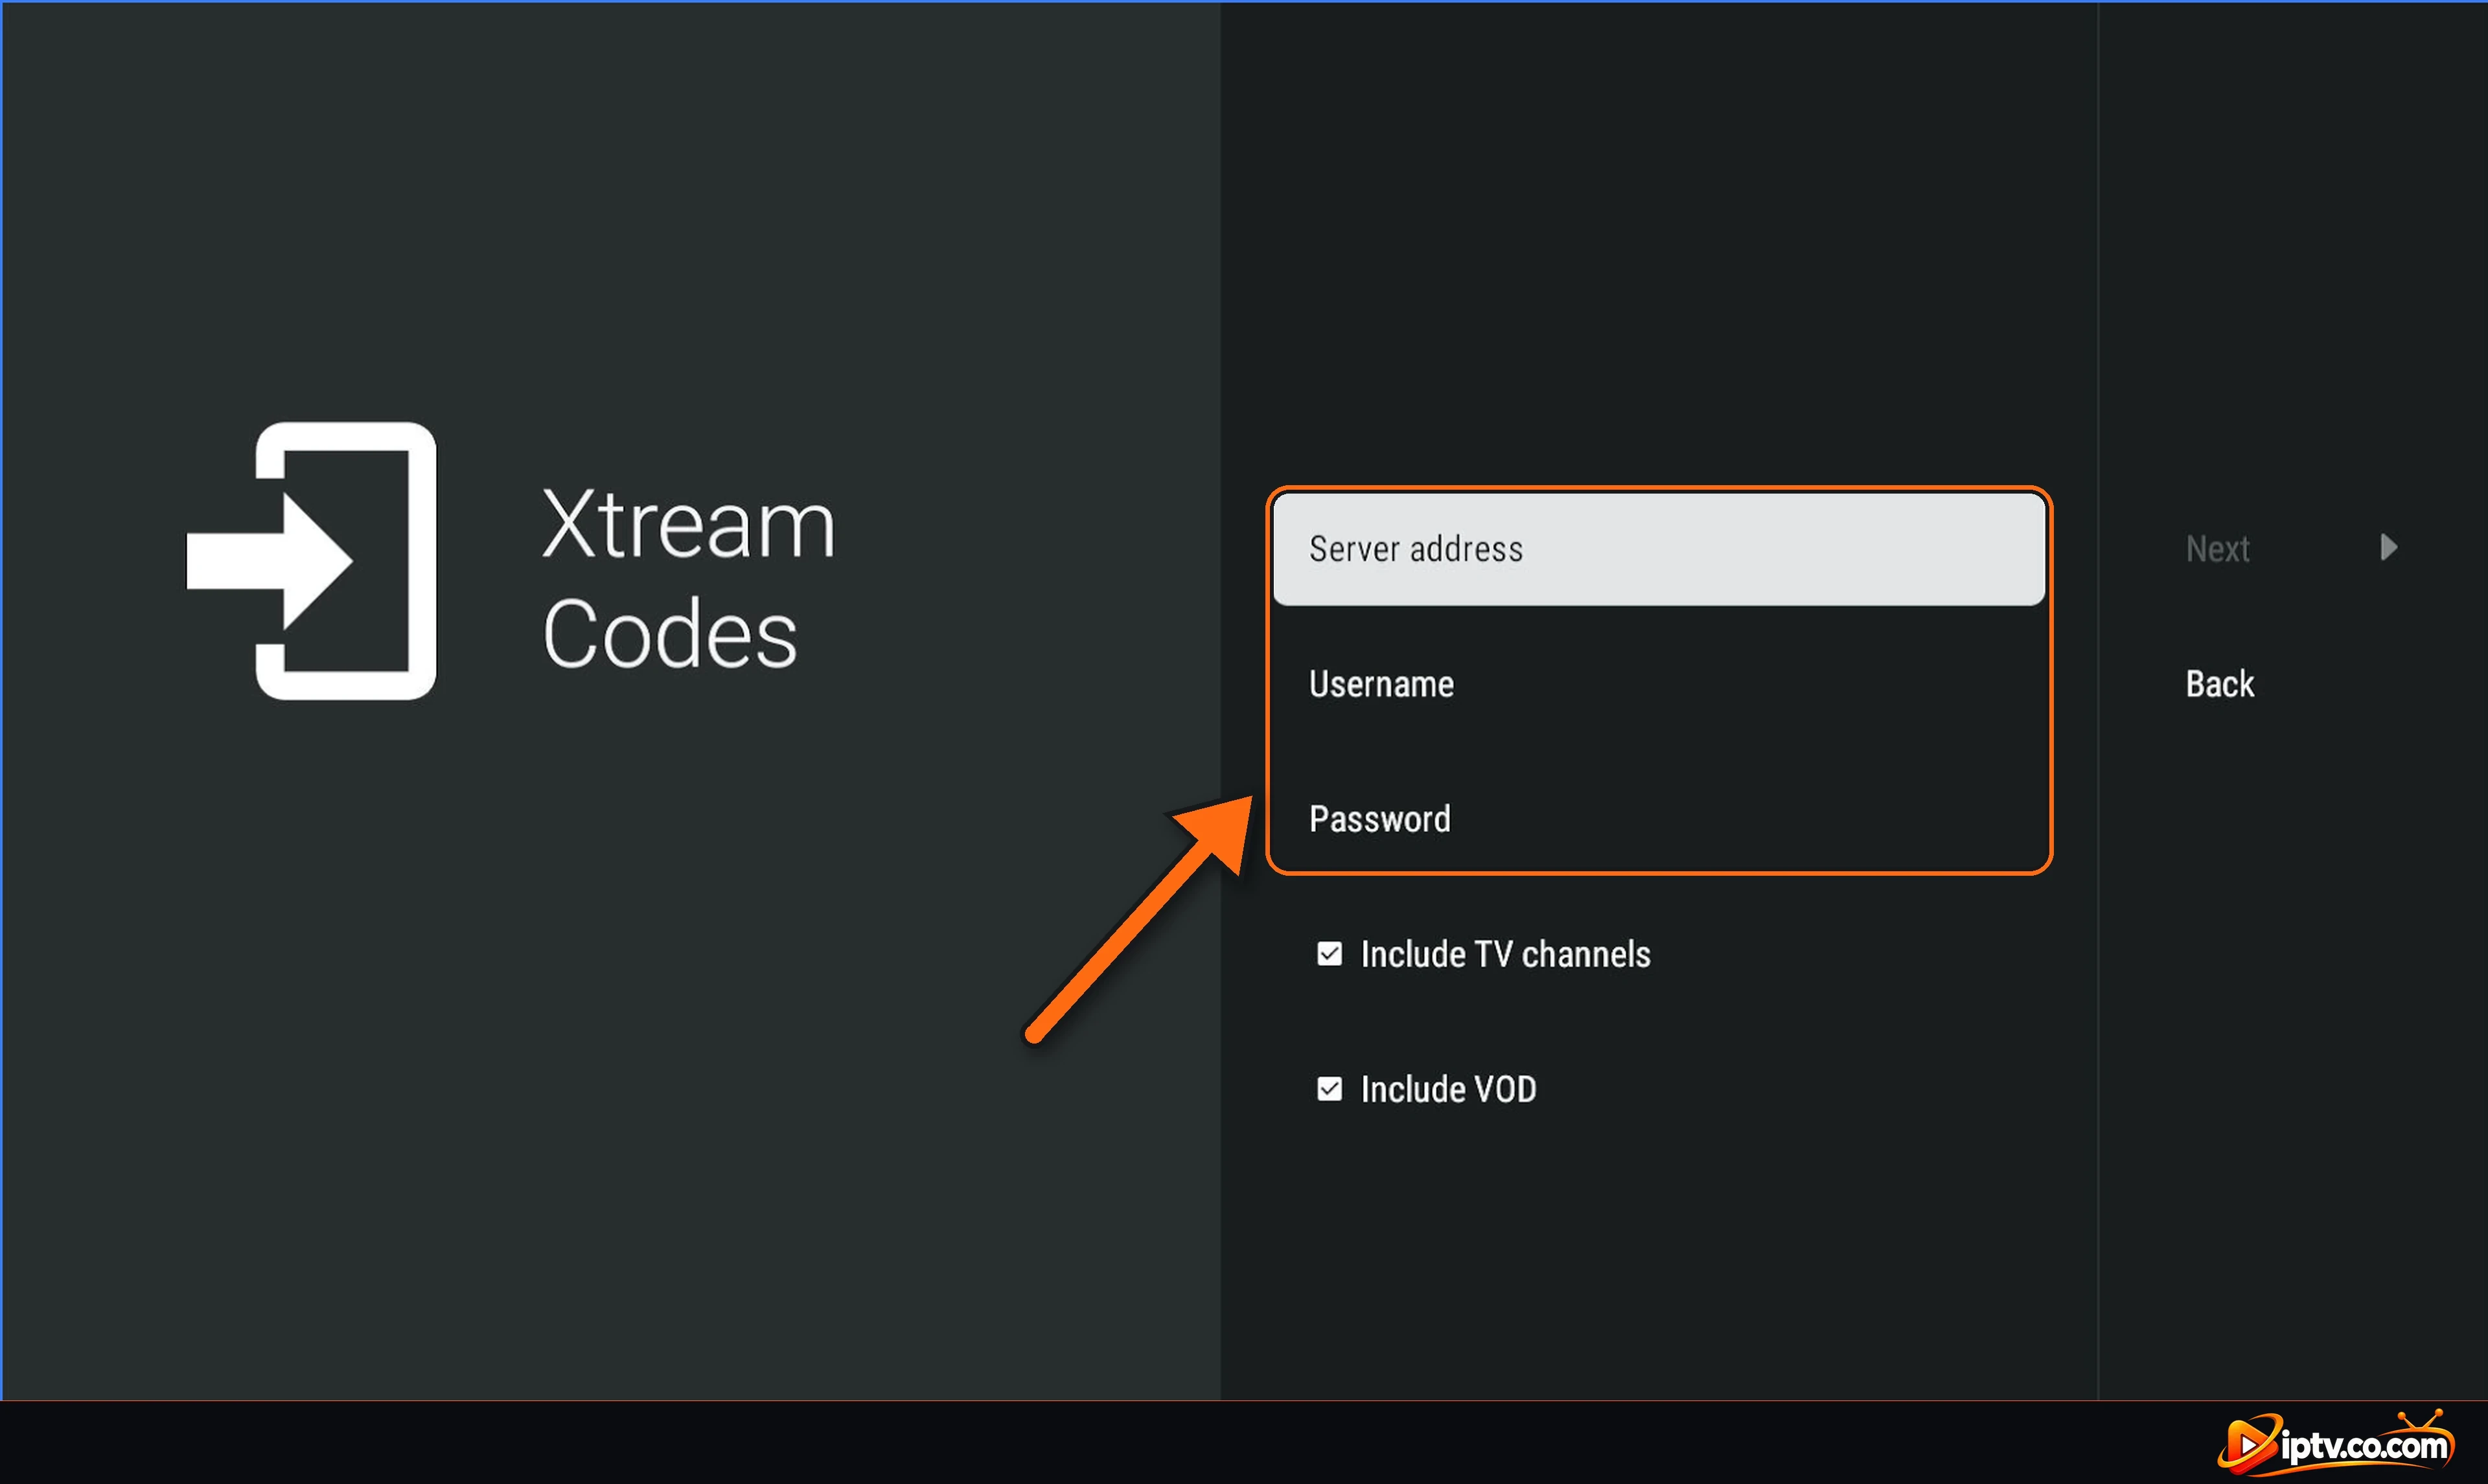
Step 3: Enter the Server Address, Username and Password
Server address: the host URL from your provider, starting with http:// and with the port if there is one (for example http://example.com:8080).
Username and Password: copy them exactly from your provider’s email.
Leave Include TV channels and Include VOD ticked to get Live TV, movies and series.
Select Server address, Username and Password to fill them in
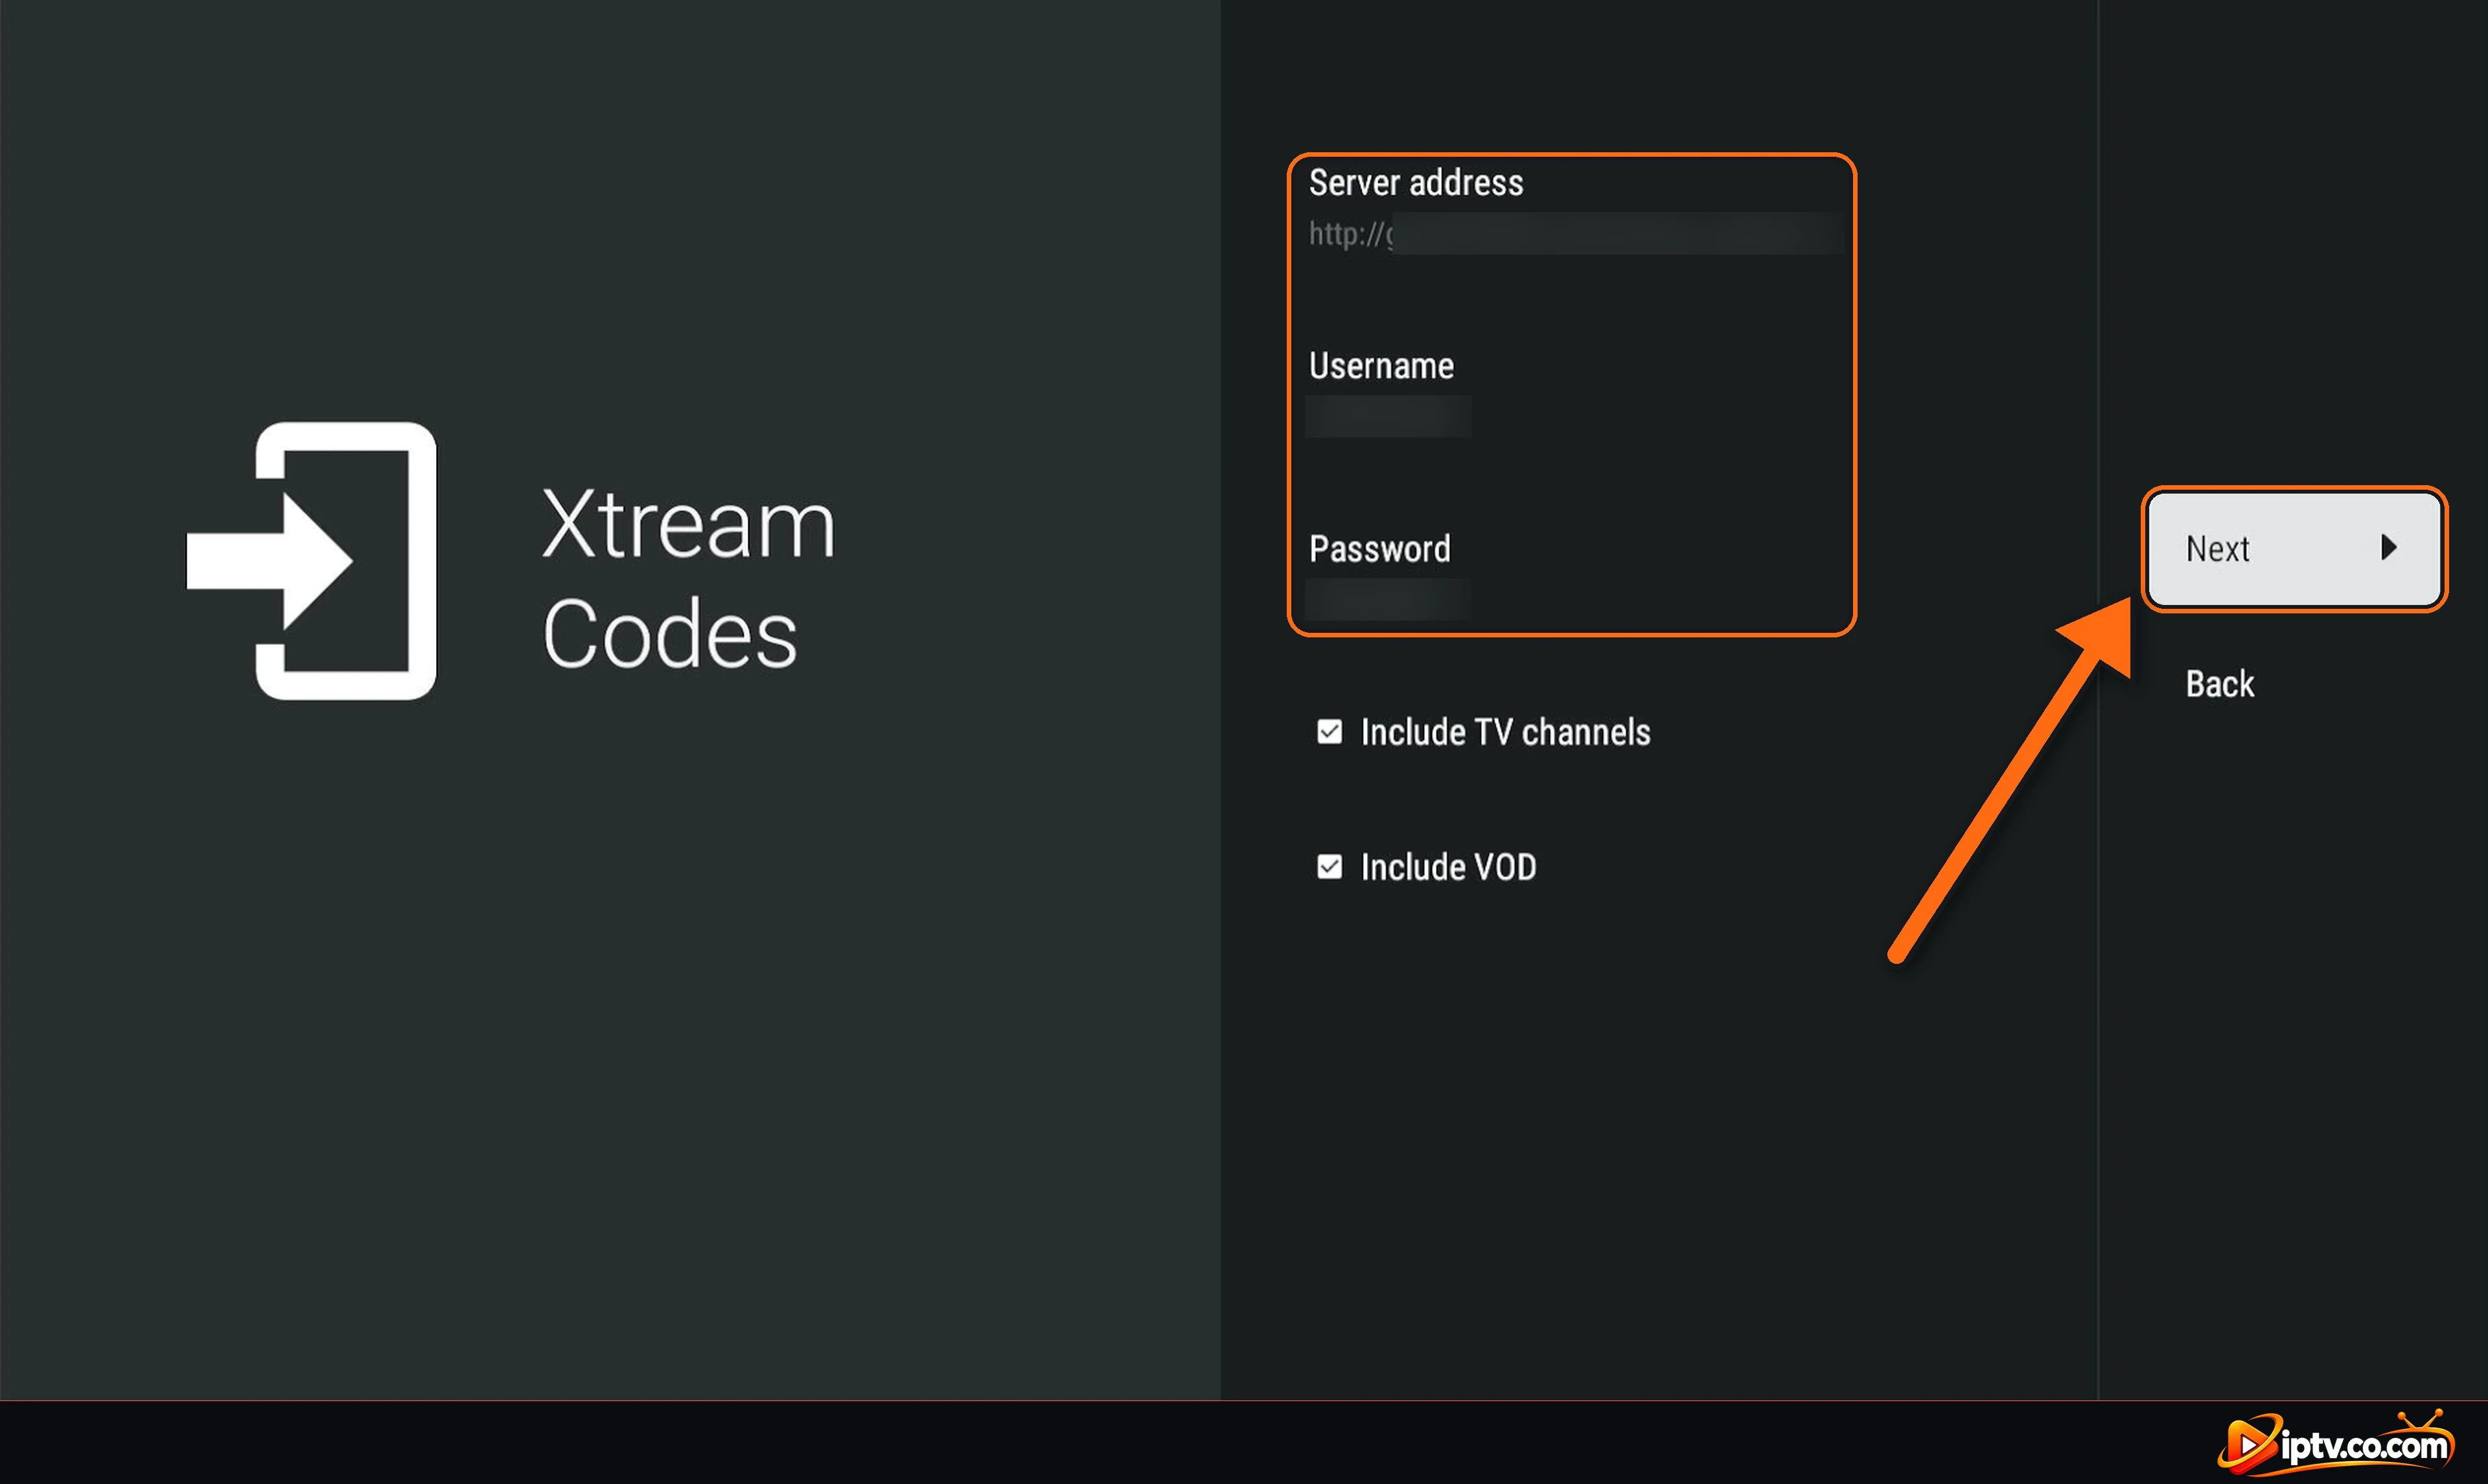
Step 4: Select Next
Check your details, then select Next on the right.
Xtream Codes entered: select Next
Step 5: Name the Playlist and Select Done
TiviMate processes the playlist, exactly like with M3U. When you see Playlist is processed with the number of channels, movies and shows, write any playlist name you like and select Done.
Playlist is processed: select Done
Watch Live TV, Movies and Series in TiviMate
Live TV and the TV Guide
TiviMate opens on Live TV with the TV guide. Pick a group on the left, then a channel in the guide: the preview starts at the top. Press OK again to watch in full screen.
TiviMate Live TV with channel groups and the TV guide
Movies
Select the Movies icon in the left menu. Choose All movies or a category, then a title.
TiviMate Movies section with categories
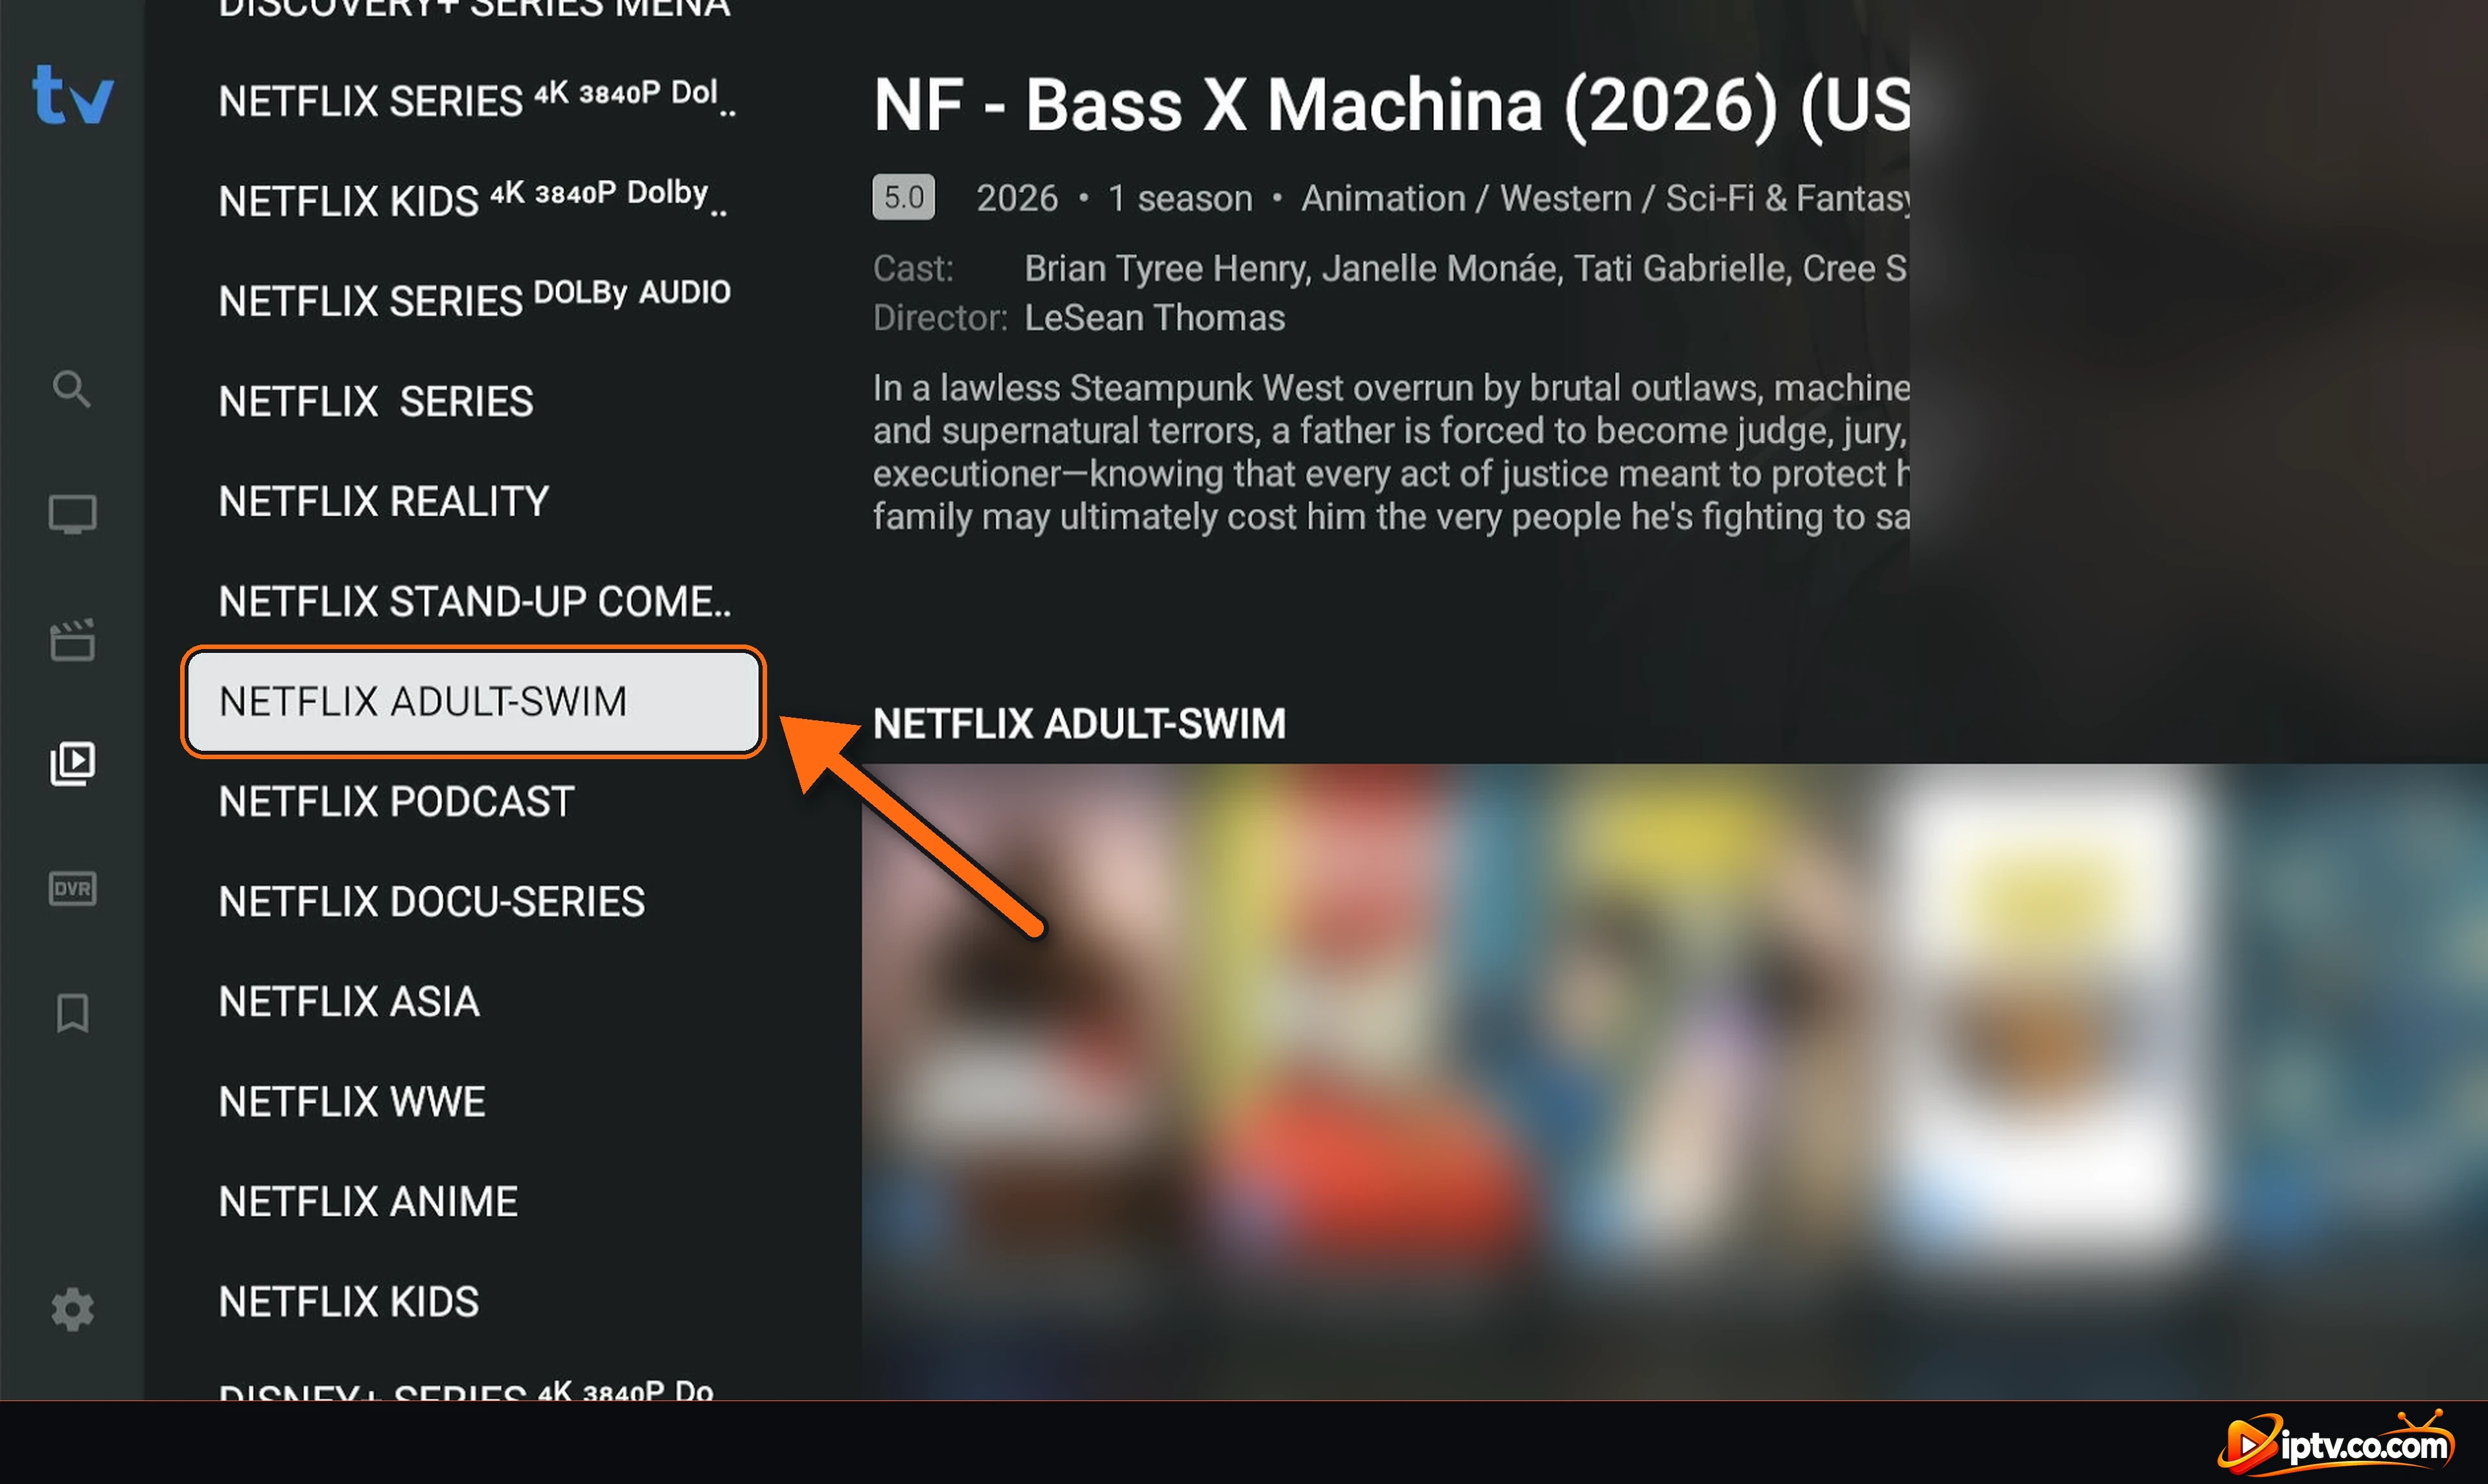
Series
Select the Series icon (below Movies) to browse your provider’s series categories and seasons.
TiviMate Series section with categories
TiviMate Premium: Is It Needed to Activate TiviMate?
You can add an M3U URL or Xtream Codes in the free version, but it only plays Live TV: movies, series and the EPG (TV guide) don’t work without TiviMate Premium. Premium also unlocks several playlists, catch-up, recording and favourites management. Full steps: how to unlock TiviMate Premium. You buy it with the TiviMate Companion app on your Android phone and sign in with the same TiviMate account on your TV device. Premium doesn’t include any channels.
Beware of “Free TiviMate Premium”
Modded “Premium unlocked” APKs and shared accounts are often malware or stop working after an update. Use the official TiviMate and TiviMate Companion only.
TiviMate Not Activating? Quick Fixes
Error after Next / playlist won’t process: check every letter of the M3U URL or the username and password. One wrong character is enough.
https instead of http: most IPTV servers only work with http://. Change https:// to http:// in the URL or server address unless your provider says otherwise.
Xtream Codes don’t work: check that the server address includes the port, then try the M3U method.
Stuck on Processing: big playlists take time. Wait 2 minutes, restart your router and try again.
0 channels: your subscription may have expired or the line is in use on another device. Contact your IPTV provider.
No TV guide: with M3U, add your provider’s EPG link in Settings > EPG; with Xtream Codes it usually loads by itself.
Keep Your Login Private
Your M3U link and Xtream Codes give access to your subscription. Don’t share them in screenshots, videos or comments.
Open TiviMate, select Add playlist, choose M3U playlist or Xtream Codes, enter your link or login, select Next, then name the playlist and select Done.
Use the left menu: TV for Live TV and the guide, Movies, Series, Recordings (Premium) and Settings. Press OK on a channel to preview, OK again for full screen.




One Response